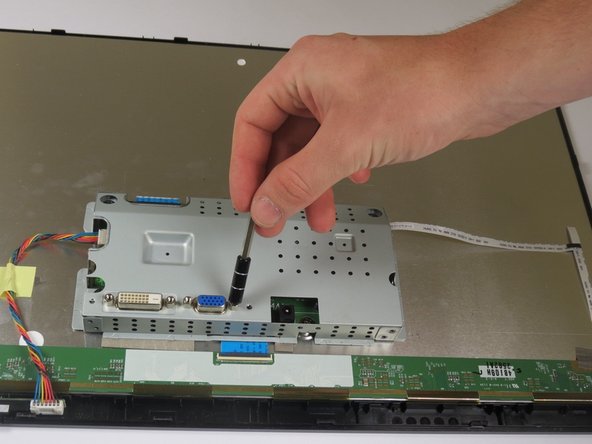
Ir para o conteúdo principal

Acer S200HL LCD Monitor ZIF Connector Replacement

O que você precisa

  1. Acer S200HL LCD Monitor ZIF Connector Replacement, ZIF Connector: passo 1, imagem 1 %32 Acer S200HL LCD Monitor ZIF Connector Replacement, ZIF Connector: passo 1, imagem 2 %32
    • Place the monitor screen face down.

    • Firmly hold the base of the stand with one hand and the bottom of the monitor with the other hand.

    • Pull the stand away from the monitor.

  2. Acer S200HL LCD Monitor ZIF Connector Replacement: passo 2, imagem 1 %32 Acer S200HL LCD Monitor ZIF Connector Replacement: passo 2, imagem 2 %32 Acer S200HL LCD Monitor ZIF Connector Replacement: passo 2, imagem 3 %32
    • Use the plastic opening tool to pry the back panel from the front panel.

    • Start at one point of the gap and pry along the entire monitor to release the clips holding the monitor together.

    • There are four clips on both the left and right sides and five clips on the top and bottom.

  3. Acer S200HL LCD Monitor ZIF Connector Replacement: passo 3, imagem 1 %32
    • Gently lift the back panel away from the monitor.

  4. Acer S200HL LCD Monitor ZIF Connector Replacement: passo 4, imagem 1 %32 Acer S200HL LCD Monitor ZIF Connector Replacement: passo 4, imagem 2 %32
    Ferramenta utilizada nesse passo:
    Magnetic Project Mat
    $19.95
    Comprar
    • Unscrew the four 7.5 mm Phillips #2 screws connecting the motherboard to the metal casing.

    • Be sure to keep track of where you place your screws. A magnetic mat is great for keeping your screws in one spot.

  5. Acer S200HL LCD Monitor ZIF Connector Replacement: passo 5, imagem 1 %32 Acer S200HL LCD Monitor ZIF Connector Replacement: passo 5, imagem 2 %32
    • Remove the four 10 mm Hex screws.

  6. Acer S200HL LCD Monitor ZIF Connector Replacement: passo 6, imagem 1 %32
    • Gently lift the motherboard casing from the monitor.

  7. Acer S200HL LCD Monitor ZIF Connector Replacement: passo 7, imagem 1 %32
    • The following steps give instructions for removing the three connectors shown in the picture.

    • No Fuse Ribbon Cable

    • ZIF Connectors

    • Bundled Cable Connector

  8. Acer S200HL LCD Monitor ZIF Connector Replacement: passo 8, imagem 1 %32
    • Lift the black seal to release the small ribbon connector (the No Fuss Ribbon Cable connector) from the motherboard.

    • The connector will be released from the motherboard immediately.

  9. Acer S200HL LCD Monitor ZIF Connector Replacement: passo 9, imagem 1 %32
    • Lift the black seal to release the large ribbon connector (the ZIF connector) from the motherboard.

    • The connector will be released from the motherboard immediately.

  10. Acer S200HL LCD Monitor ZIF Connector Replacement: passo 10, imagem 1 %32
    • Pull the bundled cable connector gently away from the motherboard.

  11. Acer S200HL LCD Monitor ZIF Connector Replacement: passo 11, imagem 1 %32
    • Gently lift the motherboard to remove it from the monitor.

  12. Acer S200HL LCD Monitor ZIF Connector Replacement: passo 12, imagem 1 %32
    • Slowly pull the tape off of the ZIF connector and the monitor.

  13. Acer S200HL LCD Monitor ZIF Connector Replacement: passo 13, imagem 1 %32
    • Lift the black seal to release the ZIF connector.

    • The connector will be released from the monitor immediately.

Conclusão

To reassemble your device, follow these instructions in reverse order.

Uma outra pessoa concluiu este guia.

Jeffrey Kong

Membro desde: 09/22/14

809 Reputação

Autoria de 5 guias

Equipe

Cal Poly, Team 12-3, Forte Fall 2014 Membro de Cal Poly, Team 12-3, Forte Fall 2014

CPSU-FORTE-F14S12G3

Membros da 5

Autoria de 10 guias

2 comentários

My model (Acer S220HQL) looks similar, but the motherboard (in its casing) was attached to the back of the screen with adhesive tape, not screws!

My problem was with the LED backlights. They often did not light up, or they switched off when I tried to alter the screen configuration (I am using it as a second monitor). Although the blue light was on, the screen went completely blank. The problem occurred with both a DVI and a D-sub connection to the PC.

After following the instructions as closely as I could, fixing the motherboard with 4 instead of 2 screws, and re-assembling, the monitor is working well. I can't think of what problem was--maybe an earth connection was broke.

-- Thanks for the instructions, they have saved my monitor until I next need to tinker with it!

badger - Responder

What is the size of the dc in of the monitor?

Johnjoseph Villarico - Responder

Adicione um comentário

Exibir estatísticas:

Últimas 24 horas: 2

Últimos 7 dias: 7

Últimos 30 dias: 22

Duração total: 4,145