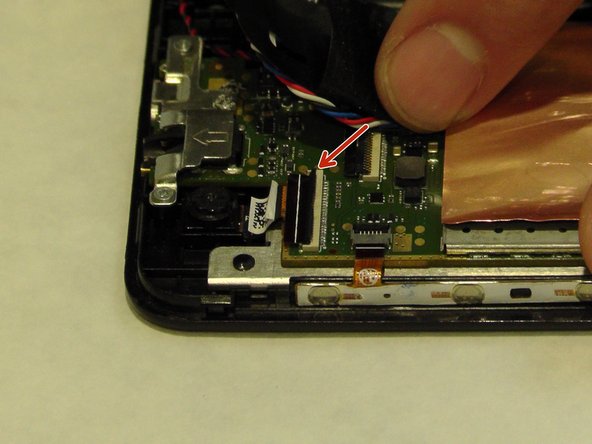
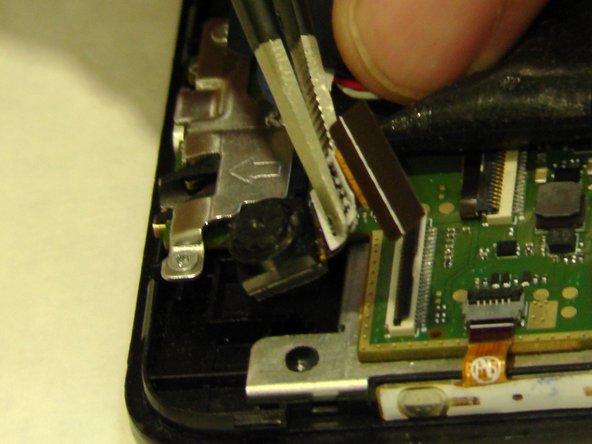
Ir para o conteúdo principal

Acer Iconia One 7 Rear-Facing Camera Replacement

O que você precisa

  1. Acer Iconia One 7 Rear-Facing Camera Replacement, Rear-Facing Camera: passo 1, imagem 1 %32
    • Begin at any side of the tablet.

    • With a plastic opening tool, begin taking apart the back cover from the tablet by working along the edges.

    • Prying the lid open can be difficult, use caution in order to safely remove.

    • Turn off device before this step.

  2. Acer Iconia One 7 Rear-Facing Camera Replacement: passo 2, imagem 1 %32
    • Using a plastic opening tool, separate the back cover from the main device.

    • Open each side continuously to ensure all sides have been separated.

  3. Acer Iconia One 7 Rear-Facing Camera Replacement: passo 3, imagem 1 %32
    • Turn the tablet over to locate the camera on the top left.

    • Besides the parts that are mentioned in the instruction, try not to agitate other fragile components inside the device.

  4. Acer Iconia One 7 Rear-Facing Camera Replacement: passo 4, imagem 1 %32 Acer Iconia One 7 Rear-Facing Camera Replacement: passo 4, imagem 2 %32
    • Peel black tape.

    • Detach clip from motherboard.

  5. Acer Iconia One 7 Rear-Facing Camera Replacement: passo 5, imagem 1 %32 Acer Iconia One 7 Rear-Facing Camera Replacement: passo 5, imagem 2 %32
    • Take out film object using tweezers.

    • Using tweezers take out camera.

Conclusão

To reassemble your device, follow these instructions in reverse order.

Michael

Membro desde: 09/03/15

519 Reputação

Autoria de 4 guias

Equipe

USF Tampa, Team 8-5, Eyestone Fall 2015 Membro de USF Tampa, Team 8-5, Eyestone Fall 2015

USFT-EYESTONE-F15S8G5

Membros da 3

Autoria de 5 guias

Um comentário

How to get new camera if the original camera is damaged

Prakash Hasabnis - Responder

Adicione um comentário

Exibir estatísticas:

Últimas 24 horas: 2

Últimos 7 dias: 8

Últimos 30 dias: 10

Duração total: 424