Ir para o conteúdo principal

Acer Extensa 4420 Back Panel Replacement

O que você precisa

  1. Acer Extensa 4420 Back Panel Replacement, Battery: passo 1, imagem 1 %32 Acer Extensa 4420 Back Panel Replacement, Battery: passo 1, imagem 2 %32
    • First, make sure that the battery lock is turned off.

    • The battery lock makes it so the battery doesn't accidentally fall out of your computer while it is running.

  2. Acer Extensa 4420 Back Panel Replacement: passo 2, imagem 1 %32 Acer Extensa 4420 Back Panel Replacement: passo 2, imagem 2 %32 Acer Extensa 4420 Back Panel Replacement: passo 2, imagem 3 %32
    • Then, slide the other battery lock while pulling the battery out.

  3. Acer Extensa 4420 Back Panel Replacement, Back Panel: passo 3, imagem 1 %32
    Ferramenta utilizada neste passo:
    Phillips #00 Screwdriver
    $5.49
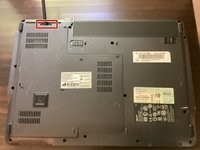
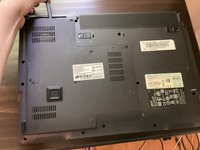
    • Unscrew all five screws on the back panel with a Phillips #00 screwdriver

    • The screws will stay in the back panel, so when you remove it, you don't have to worry about organizing the screws.

  4. Acer Extensa 4420 Back Panel Replacement: passo 4, imagem 1 %32 Acer Extensa 4420 Back Panel Replacement: passo 4, imagem 2 %32 Acer Extensa 4420 Back Panel Replacement: passo 4, imagem 3 %32
    Ferramenta utilizada neste passo:
    Spudger
    $3.99
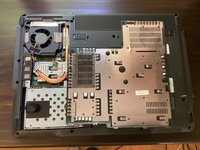
    • Take a spudger and start to pry open the back panel. Finish prying it open with your hands.

    • Be extra careful and try not to break any clips in this process.

Conclusão

To reassemble your device, follow these instructions in reverse order.

TheMasterG

Membro desde: 07/19/24

1.369 Reputação

Autoria de 12 guias

0Comentários do guia

Comentar

Visualizações:

Últimas 24 horas: 0

Últimos 7 dias: 2

Últimos 30 dias: 11

Ao todo: 119