Ir para o conteúdo principal

Acer Chromebook CB5-312T-K 8Z9 Battery Replacement

O que você precisa

  1. Acer Chromebook CB5-312T-K 8Z9 Battery Replacement, Acer Chromebook CB5-312T-K 8Z9 Back Cover: passo 1, imagem 1 %32 Acer Chromebook CB5-312T-K 8Z9 Battery Replacement, Acer Chromebook CB5-312T-K 8Z9 Back Cover: passo 1, imagem 2 %32
    • First begin by flipping the laptop on its back and having the back cover face you directly.

    • Then unscrew the ten Phillips head screws that hold down the back cover using a Phillips #0 Screw Driver.  

  2. Acer Chromebook CB5-312T-K 8Z9 Battery Replacement: passo 2, imagem 1 %32
    • Using a plastic spudger, open the back cover and remove it from the laptop.

  3. Acer Chromebook CB5-312T-K 8Z9 Battery Replacement, Battery: passo 3, imagem 1 %32 Acer Chromebook CB5-312T-K 8Z9 Battery Replacement, Battery: passo 3, imagem 2 %32 Acer Chromebook CB5-312T-K 8Z9 Battery Replacement, Battery: passo 3, imagem 3 %32
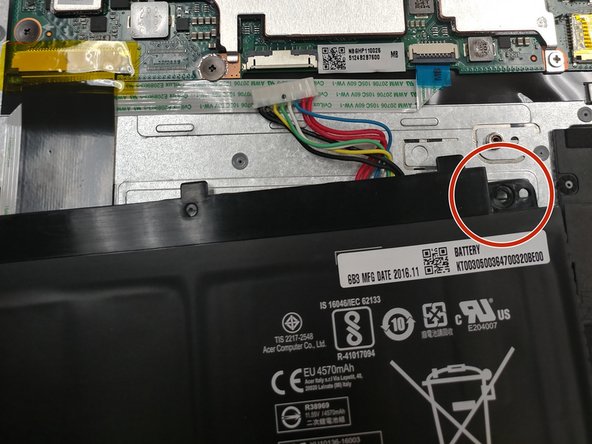
    • look for the battery in the bottom half of the computer

    • Once you have found the battery, look for the screws that secure the battery, in the upper left and right corners.

  4. Acer Chromebook CB5-312T-K 8Z9 Battery Replacement: passo 4, imagem 1 %32 Acer Chromebook CB5-312T-K 8Z9 Battery Replacement: passo 4, imagem 2 %32 Acer Chromebook CB5-312T-K 8Z9 Battery Replacement: passo 4, imagem 3 %32
    • Begin by unscrewing the two Phillips head screws that hold down the battery using a J1 sized screwdriver.

    • Finally remove the battery from the laptop.

Conclusão

To reassemble your device, follow these instructions in reverse order.

0 comentários

Adicione um comentário

Exibir estatísticas:

Últimas 24 horas: 0

Últimos 7 dias: 5

Últimos 30 dias: 31

Duração total: 1,473