Ir para o conteúdo principal

Esta versão pode conter edições incorretas. Mude para o último instantâneo verificado.

O que você precisa

  1. Este passo não foi traduzido. Ajude a traduzi-lo

    : passo 1, imagem 1 %32 : passo 1, imagem 2 %32
    • Place your Chromebook upside down.

    • Utilizing the precision magnetized Phillips #0 screwdriver, remove all thirteen 6.5 mm Phillips screws that secure the back cover.

    • Before doing anything, make sure your Acer Chromebook is completely turned off.

  2. Este passo não foi traduzido. Ajude a traduzi-lo

    : passo 2, imagem 1 %32
    • Use the plastic opening tool to carefully remove the bottom.

  3. Este passo não foi traduzido. Ajude a traduzi-lo

    : passo 3, imagem 1 %32 : passo 3, imagem 2 %32
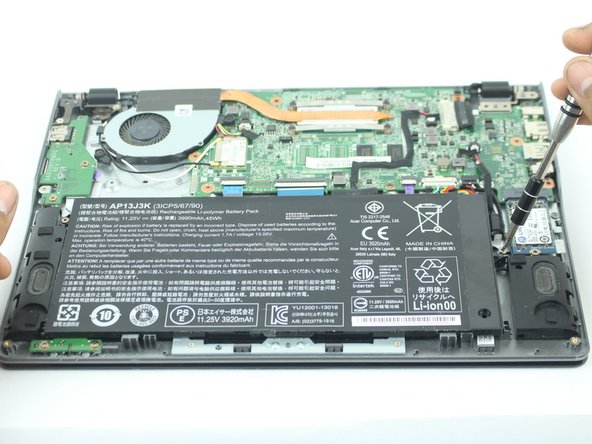
    • Remove the two 3.6 mm Phillips screws holding the battery in place.

  4. Este passo não foi traduzido. Ajude a traduzi-lo

    : passo 4, imagem 1 %32 : passo 4, imagem 2 %32
    Ferramenta utilizada nesse passo:
    Tweezers
    $4.99
    Comprar
    • Disconnect the connector that attaches the battery to the Chromebook with a pair of pliers or tweezers.

    • Alternatively, you could use your hands, as it may be difficult to unhook the connector.

  5. Este passo não foi traduzido. Ajude a traduzi-lo

    : passo 5, imagem 1 %32
    • Remove the battery.

  6. Este passo não foi traduzido. Ajude a traduzi-lo

    : passo 6, imagem 1 %32 : passo 6, imagem 2 %32
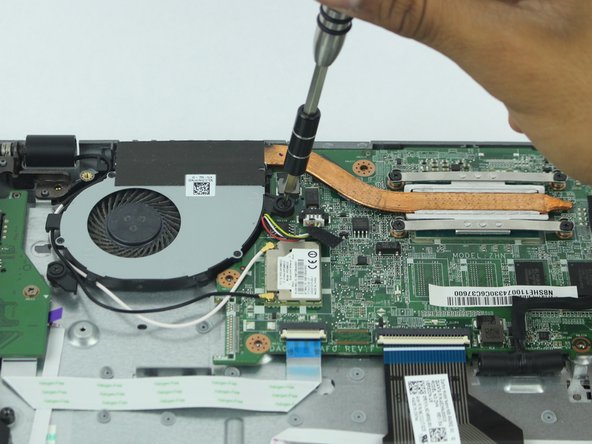
    • Remove the six 4.7 mm Phillips screws that secure the fan.

  7. Este passo não foi traduzido. Ajude a traduzi-lo

    : passo 7, imagem 1 %32 : passo 7, imagem 2 %32 : passo 7, imagem 3 %32
    Ferramenta utilizada nesse passo:
    Tweezers
    $4.99
    Comprar
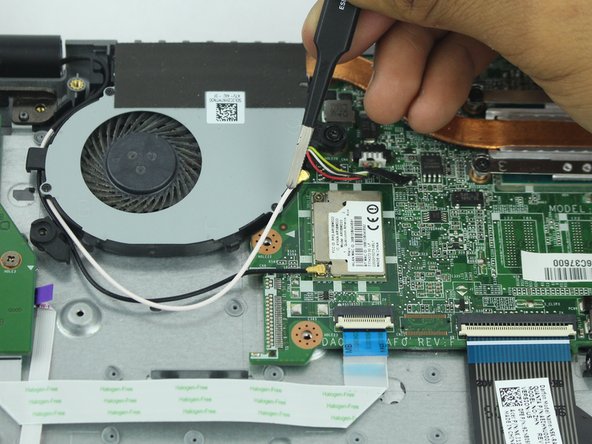
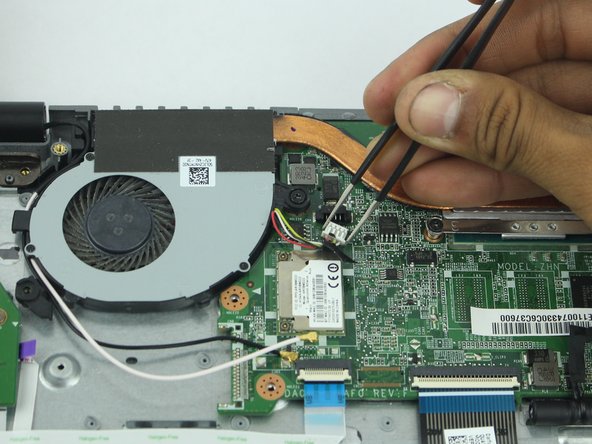
    • Disconnect these cables from the motherboard using the tweezers.

    • Alternatively, you may use your hands.

    • Pull out the fan.

  8. Este passo não foi traduzido. Ajude a traduzi-lo

    : passo 8, imagem 1 %32 : passo 8, imagem 2 %32
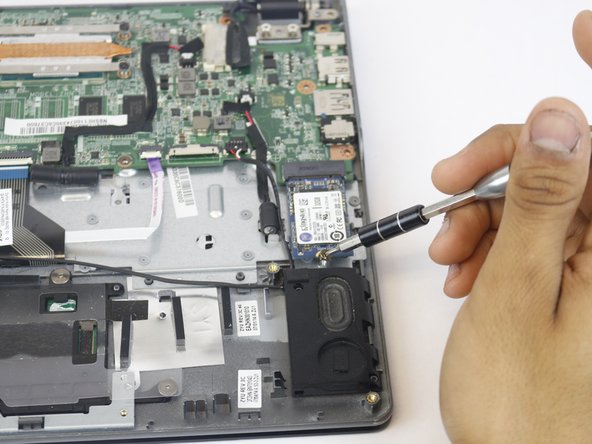
    • Remove the 3.6 mm Phillips screw that secures the SSD in place.

  9. Este passo não foi traduzido. Ajude a traduzi-lo

    : passo 9, imagem 1 %32 : passo 9, imagem 2 %32
    • Pull out the SSD.

  10. Este passo não foi traduzido. Ajude a traduzi-lo

    : passo 10, imagem 1 %32
    • Disconnect the speaker cable from the motherboard.

  11. Este passo não foi traduzido. Ajude a traduzi-lo

    : passo 11, imagem 1 %32
    • Disconnect the display cable from the motherboard.

  12. Este passo não foi traduzido. Ajude a traduzi-lo

    : passo 12, imagem 1 %32
    • Gently pull out the wire for the 2 PIC connectors.

  13. Este passo não foi traduzido. Ajude a traduzi-lo

    : passo 13, imagem 1 %32
    • Remove the two 3.7 mm Phillips screws that hold the motherboard in place.

  14. Este passo não foi traduzido. Ajude a traduzi-lo

    : passo 14, imagem 1 %32
    • Lift up the black tab on the ZIF connector to release the ribbon cable.

    • Carefully remove the ribbon cable.

  15. Este passo não foi traduzido. Ajude a traduzi-lo

    : passo 15, imagem 1 %32
    • Lift up the black tab on the ZIF connector to release the ribbon cable.

    • Gently remove the ribbon cable

  16. Este passo não foi traduzido. Ajude a traduzi-lo

    : passo 16, imagem 1 %32
    • Lift up the black tab on the ZIF connector to release the ribbon cable.

    • Remove the ribbon cable.

  17. Este passo não foi traduzido. Ajude a traduzi-lo

    : passo 17, imagem 1 %32
    • Lift up and remove the motherboard.

Linha de Chegada

Josue Pardo

Membro desde: 02/12/18

187 Reputação

Autoria de 1 guia

Equipe

USF Tampa, Team S15-G4, Boczar Spring 2018 Membro de USF Tampa, Team S15-G4, Boczar Spring 2018

USFT-BOCZAR-S18S15G4

Membros da 4

Autoria de 12 guias

0 comentários

Adicione um comentário

Exibir estatísticas:

Últimas 24 horas: 0

Últimos 7 dias: 5

Últimos 30 dias: 9

Duração total: 316