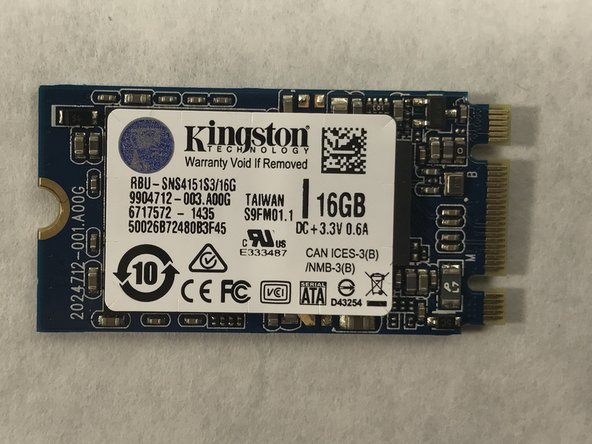
Ir para o conteúdo principal

Acer Chromebook C720-2103 Solid State Drive Replacement

O que você precisa

  1. Acer Chromebook C720-2103 Solid State Drive Replacement, Battery: passo 1, imagem 1 %32 Acer Chromebook C720-2103 Solid State Drive Replacement, Battery: passo 1, imagem 2 %32
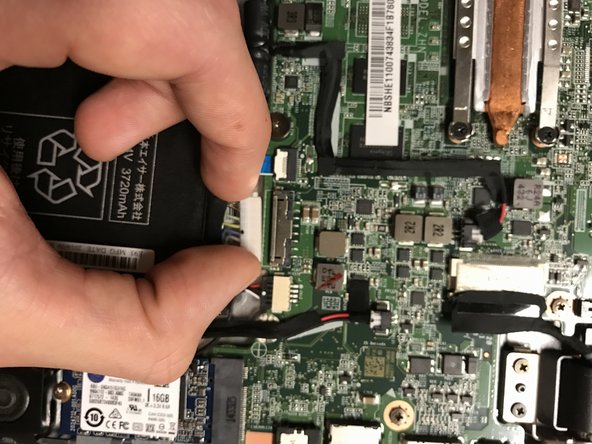
    • Shut the device off.

    • Turn the device over so the bottom is facing up.

    • Remove all thirteen 6mm screws using a Phillips #0 screwdriver.

    • Remember to keep screws separated by step and their locations in the device. This will help prevent confusion during reassembly.

    • Removing the battery is necessary to prevent electric shock during part replacement.

  2. Acer Chromebook C720-2103 Solid State Drive Replacement: passo 2, imagem 1 %32
    • Wedge a plastic opening tool between the back casing and the rest of the device.

    • Apply pressure up and down carefully, until backing pops up. Repeat this process in multiple spots if needed.

    • It is easiest to start at the back of the device, between the hinges of the screen.

    • Do not apply too much force. This will crack the plastic.

  3. Acer Chromebook C720-2103 Solid State Drive Replacement: passo 3, imagem 1 %32
    • Remove the three 6mm screws indicated by the red circles with a Phillips #0 screwdriver.

  4. Acer Chromebook C720-2103 Solid State Drive Replacement: passo 4, imagem 1 %32 Acer Chromebook C720-2103 Solid State Drive Replacement: passo 4, imagem 2 %32
    • Pull the rainbow cable connector out of the white terminal by wiggling it gently from side to side with your fingers.

    • Be careful when removing the cable. Too much force can damage the motherboard or the cable connector.

  5. Acer Chromebook C720-2103 Solid State Drive Replacement: passo 5, imagem 1 %32 Acer Chromebook C720-2103 Solid State Drive Replacement: passo 5, imagem 2 %32
    • Lift the battery straight up and out of the device with your hands. Take care not to knock the battery against another component.

  6. Acer Chromebook C720-2103 Solid State Drive Replacement, Solid State Drive: passo 6, imagem 1 %32
    • Remove one 6mm screw using a Phillips #0 screwdriver.

  7. Acer Chromebook C720-2103 Solid State Drive Replacement: passo 7, imagem 1 %32 Acer Chromebook C720-2103 Solid State Drive Replacement: passo 7, imagem 2 %32 Acer Chromebook C720-2103 Solid State Drive Replacement: passo 7, imagem 3 %32
    • Carefully remove the solid state drive from the solid state drive slot by sliding it downward away from the motherboard.

Conclusão

To reassemble your device, follow these instructions in reverse order.

2 outras pessoas executaram este guia.

Matthew Holt

Membro desde: 10/17/17

633 Reputação

Autoria de 5 guias

Equipe

UMass Dartmouth, Team S66-G3, Rockett Fall 2017 Membro de UMass Dartmouth, Team S66-G3, Rockett Fall 2017

UMASSD-ROCKETT-F17S66G3

Membros da 3

Autoria de 10 guias

0 comentários

Adicione um comentário

Exibir estatísticas:

Últimas 24 horas: 0

Últimos 7 dias: 0

Últimos 30 dias: 4

Duração total: 268