Ir para o conteúdo principal

Acer Chromebook C710-2856 Hard Drive Replacement

O que você precisa

  1. Acer Chromebook C710-2856 Hard Drive Replacement, Removing Back Cover: passo 1, imagem 1 %32 Acer Chromebook C710-2856 Hard Drive Replacement, Removing Back Cover: passo 1, imagem 2 %32
    • Remove the one 4.3mm Phillips #1 screw holding the back cover on.

  2. Acer Chromebook C710-2856 Hard Drive Replacement, Unscrewing the Drive: passo 2, imagem 1 %32
    • Remove the four 2.8mm Phillips #000 screws holding the drive onto the case.

  3. Acer Chromebook C710-2856 Hard Drive Replacement, Uncovering the Pins: passo 3, imagem 1 %32
    • Gently pull the foam protector away from the pin connectors

  4. Acer Chromebook C710-2856 Hard Drive Replacement, Disconnecting the Drive: passo 4, imagem 1 %32 Acer Chromebook C710-2856 Hard Drive Replacement, Disconnecting the Drive: passo 4, imagem 2 %32
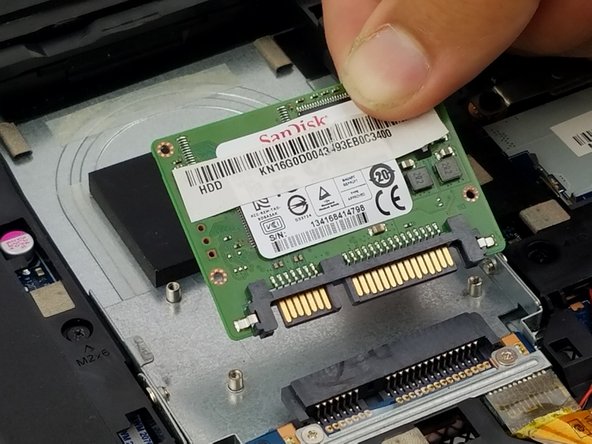
    • Gently pull the drive up and away to disconnect the hard drive from its seat

  5. Acer Chromebook C710-2856 Hard Drive Replacement, Removed Drive and Pieces: passo 5, imagem 1 %32
    • Fully removed hard drive, screws, and foam cover

Conclusão

To reassemble your device, follow these instructions in reverse order.

Josh Rowell

Membro desde: 10/10/17

146 Reputação

Autoria de 1 guia

Equipe

USF Tampa, Team S6-G5, Remmell Fall 2017 Membro de USF Tampa, Team S6-G5, Remmell Fall 2017

USFT-REMMELL-F17S6G5

Membros da 7

Autoria de 8 guias

0 comentários

Adicione um comentário

Exibir estatísticas:

Últimas 24 horas: 0

Últimos 7 dias: 2

Últimos 30 dias: 8

Duração total: 330