Ir para o conteúdo principal

Acer Aspire V5-571 Cooling System Replacement

O que você precisa

Vídeo de Apresentação

  1. Acer Aspire V5-571 Cooling System Replacement, Keyboard: passo 1, imagem 1 %32 Acer Aspire V5-571 Cooling System Replacement, Keyboard: passo 1, imagem 2 %32 Acer Aspire V5-571 Cooling System Replacement, Keyboard: passo 1, imagem 3 %32
    • Turn off the laptop and remove the battery.

    • Remove two screws securing the Keyboard.

    • The Keyboard is held by two locking clips, under the battery. Use the sharp tip of a plastic tool to release the keyboard.

  2. Acer Aspire V5-571 Cooling System Replacement: passo 2, imagem 1 %32 Acer Aspire V5-571 Cooling System Replacement: passo 2, imagem 2 %32 Acer Aspire V5-571 Cooling System Replacement: passo 2, imagem 3 %32
  3. Acer Aspire V5-571 Cooling System Replacement, Optical Drive: passo 3, imagem 1 %32 Acer Aspire V5-571 Cooling System Replacement, Optical Drive: passo 3, imagem 2 %32 Acer Aspire V5-571 Cooling System Replacement, Optical Drive: passo 3, imagem 3 %32
    • Remove the screw securing the Optical drive and gently press the drive to show slightly as at the second pic.

    • Slide the drive to the left and remove it.

  4. Acer Aspire V5-571 Cooling System Replacement, Upper  Cover: passo 4, imagem 1 %32 Acer Aspire V5-571 Cooling System Replacement, Upper  Cover: passo 4, imagem 2 %32 Acer Aspire V5-571 Cooling System Replacement, Upper  Cover: passo 4, imagem 3 %32
    • Remove 4x phillips screws and disconnect:

    • Power On button flex cable

    • Touch pad flex cable

    • Remove 18x Phillips screws from the bottom cover.

    • Remove any memory SD Card from the Card reader.

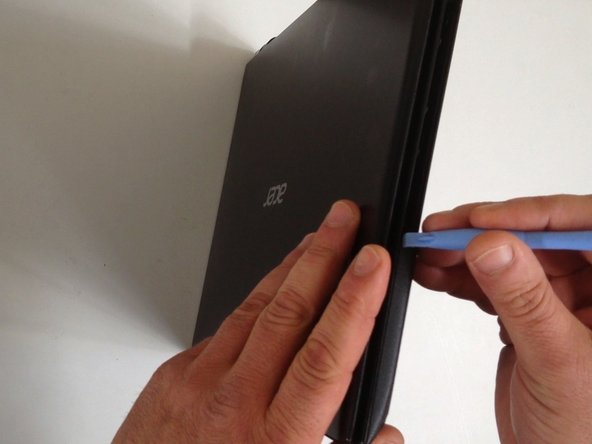
    • Start opening with a plastic opening tool.

  5. Acer Aspire V5-571 Cooling System Replacement: passo 5, imagem 1 %32 Acer Aspire V5-571 Cooling System Replacement: passo 5, imagem 2 %32 Acer Aspire V5-571 Cooling System Replacement: passo 5, imagem 3 %32
    • Carefully separate the upper cover and remove it.

  6. Acer Aspire V5-571 Cooling System Replacement, HDD (Hard Disk Drive): passo 6, imagem 1 %32 Acer Aspire V5-571 Cooling System Replacement, HDD (Hard Disk Drive): passo 6, imagem 2 %32 Acer Aspire V5-571 Cooling System Replacement, HDD (Hard Disk Drive): passo 6, imagem 3 %32
  7. Acer Aspire V5-571 Cooling System Replacement, Wi-Fi Half Mini PCIe card: passo 7, imagem 1 %32 Acer Aspire V5-571 Cooling System Replacement, Wi-Fi Half Mini PCIe card: passo 7, imagem 2 %32
    • Remove one Phillips screw, securing th WLan card and disconnect the two coaxial antenna cables.

    • Remove the Wi-Fi card.

  8. Acer Aspire V5-571 Cooling System Replacement, Mother Board: passo 8, imagem 1 %32 Acer Aspire V5-571 Cooling System Replacement, Mother Board: passo 8, imagem 2 %32 Acer Aspire V5-571 Cooling System Replacement, Mother Board: passo 8, imagem 3 %32
    • Remove the Memory Cover.

    • Disconnect the Loudspeaker cable connector.

  9. Acer Aspire V5-571 Cooling System Replacement: passo 9, imagem 1 %32 Acer Aspire V5-571 Cooling System Replacement: passo 9, imagem 2 %32 Acer Aspire V5-571 Cooling System Replacement: passo 9, imagem 3 %32
    • Remove two Phillips screw from the Mother board and from the Optical drive SATA adapter.

    • Disconnect the LCD Display flex cable.

    • Disconnect the DC Jack cable.

    • Carefully remove the Optical drive SATA adapter.

    • We will disconnect the battery cable when we pick up the board.

  10. Acer Aspire V5-571 Cooling System Replacement: passo 10, imagem 1 %32 Acer Aspire V5-571 Cooling System Replacement: passo 10, imagem 2 %32 Acer Aspire V5-571 Cooling System Replacement: passo 10, imagem 3 %32
    • Carefully pick up the Mother board and disconnect the Battery cable.

  11. Acer Aspire V5-571 Cooling System Replacement, Cooling System and CPU Thermal Paste Replacement: passo 11, imagem 1 %32 Acer Aspire V5-571 Cooling System Replacement, Cooling System and CPU Thermal Paste Replacement: passo 11, imagem 2 %32
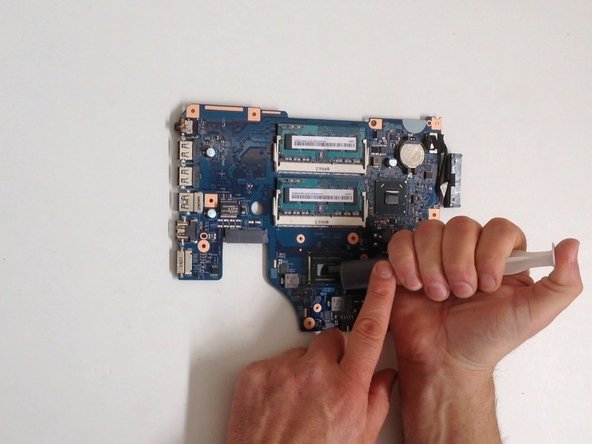
    • Disconnect the Fan cable.

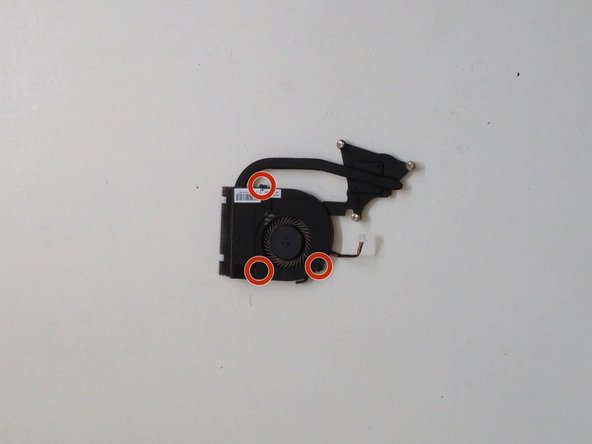
    • Unscrew the screws that hold the Cooling system to the Mother board.

    • Carefully lift the Cooling system right up.

  12. Acer Aspire V5-571 Cooling System Replacement: passo 12, imagem 1 %32 Acer Aspire V5-571 Cooling System Replacement: passo 12, imagem 2 %32
    • Use a lint-free cloth to clean the old thermal compound.

    • If the thermal compound is solidified, you can use a flat end of any plastic tool to scrape it off.

    • Use again cloth with isopropyl alcohol to clean the Thermal surface.

    • Remove three Philips screws held the Fan shield.

  13. Acer Aspire V5-571 Cooling System Replacement: passo 13, imagem 1 %32 Acer Aspire V5-571 Cooling System Replacement: passo 13, imagem 2 %32 Acer Aspire V5-571 Cooling System Replacement: passo 13, imagem 3 %32
    • Unstick the black tape that hold the Fan to the cooler.

    • Unlock the clip and open the Fan case.

    • Use a soft brush and clean the Fan and the Cooler

    • Close the Fan system.

  14. Acer Aspire V5-571 Cooling System Replacement: passo 14, imagem 1 %32 Acer Aspire V5-571 Cooling System Replacement: passo 14, imagem 2 %32 Acer Aspire V5-571 Cooling System Replacement: passo 14, imagem 3 %32
    • Use the same technic to clean the surface of the processor from the old thermal compound

    • Be carefully,if you don't want to break the CPU.

    • Dispense a small amount of thermal compound and gently smear it over the entire processor surface.

    • .

    • .

    • .

    • Did you do it successful?

Conclusão

To reassemble your device, follow these instructions in reverse order.

4 outras pessoas executaram este guia.

ZFix

Membro desde: 12/09/13

191.055 Reputação

Autoria de 330 guias

Equipe

Master Techs Membro de Master Techs

Community

Membros da 322

Autoria de 2.506 guias

Um comentário

Hello!

Is ist possible to installa SSD storage to the V5-571G without removing the SATA?

Thanks for your reply

lukasrohrer - Responder

Adicione um comentário

Exibir estatísticas:

Últimas 24 horas: 1

Últimos 7 dias: 13

Últimos 30 dias: 39

Duração total: 9,096