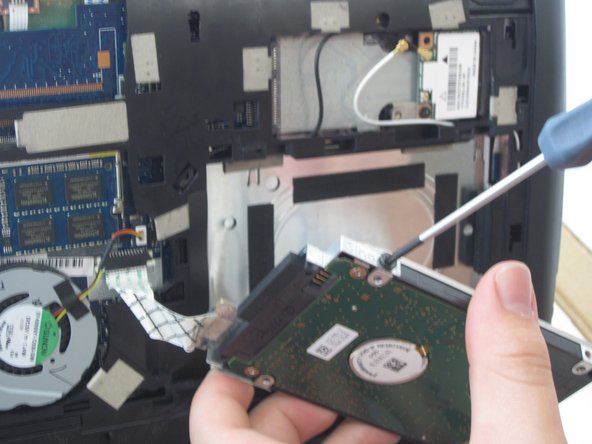
Ir para o conteúdo principal

Acer Aspire One P1VE6 Hard Drive Replacement

O que você precisa

  1. Acer Aspire One P1VE6 Hard Drive Replacement, Back Panel: passo 1, imagem 1 %32
    • Close the netbook and turn it over so the back panel faces you.

  2. Acer Aspire One P1VE6 Hard Drive Replacement: passo 2, imagem 1 %32
    • Locate the 4 mm Phillips #1 screw at the bottom of the back panel. Using the Phillips head screwdriver, remove the screw. Place the screw somewhere it will not be lost. Then remove the back panel by gently sliding it towards the front.

  3. Acer Aspire One P1VE6 Hard Drive Replacement, Hard Drive: passo 3, imagem 1 %32
    • After removing the back panel, locate the hard drive.

  4. Acer Aspire One P1VE6 Hard Drive Replacement: passo 4, imagem 1 %32
    • Carefully lift up the hard drive.

  5. Acer Aspire One P1VE6 Hard Drive Replacement: passo 5, imagem 1 %32 Acer Aspire One P1VE6 Hard Drive Replacement: passo 5, imagem 2 %32
    • Locate the two 4 mm Philips #1 screws holding the hard drive into its bracket.

    • Remove the two screws and place them somewhere they will not be lost.

  6. Acer Aspire One P1VE6 Hard Drive Replacement: passo 6, imagem 1 %32 Acer Aspire One P1VE6 Hard Drive Replacement: passo 6, imagem 2 %32
    • Unplug the hard drive from the bracket.

Conclusão

To reassemble your device, follow these instructions in reverse order.

2 comentários

tiene 4 ram hasta cuanto soporta gracias...

elteto77 - Responder

Was reviewing this to see if it was possible to reattach the drive connector if removed. (dealing with this in this model of laptop)

Shirley Hicks - Responder

Adicione um comentário

Exibir estatísticas:

Últimas 24 horas: 0

Últimos 7 dias: 1

Últimos 30 dias: 18

Duração total: 2,780