Ir para o conteúdo principal

Acer Aspire One Cloudbook 11 AO1-131-C7DW Back Panel Replacement

O que você precisa

  1. Acer Aspire One Cloudbook 11 AO1-131-C7DW Back Panel Replacement, Back Panel: passo 1, imagem 1 %32 Acer Aspire One Cloudbook 11 AO1-131-C7DW Back Panel Replacement, Back Panel: passo 1, imagem 2 %32 Acer Aspire One Cloudbook 11 AO1-131-C7DW Back Panel Replacement, Back Panel: passo 1, imagem 3 %32
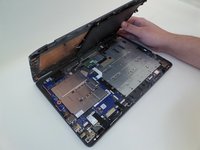
    • Power the laptop off.

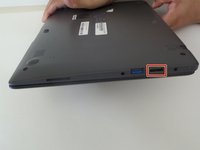
    • Flip the laptop over and position it so the opening faces you.

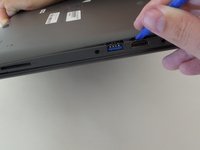
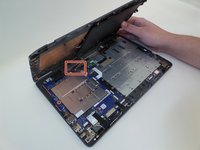
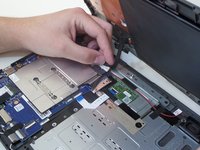
    • Remove the rubber foot located near the opening side of the device using tweezers.

  2. Acer Aspire One Cloudbook 11 AO1-131-C7DW Back Panel Replacement: passo 2, imagem 1 %32 Acer Aspire One Cloudbook 11 AO1-131-C7DW Back Panel Replacement: passo 2, imagem 2 %32
    • Unscrew the five 5-mm screws using the PH0 screwdriver.

  3. Acer Aspire One Cloudbook 11 AO1-131-C7DW Back Panel Replacement: passo 3, imagem 1 %32 Acer Aspire One Cloudbook 11 AO1-131-C7DW Back Panel Replacement: passo 3, imagem 2 %32 Acer Aspire One Cloudbook 11 AO1-131-C7DW Back Panel Replacement: passo 3, imagem 3 %32
    • Identify the HDMI port located in the side of the laptop opposite to the power button.

    • Insert the plastic opening tool into the divet of the back panel located above the HDMI port.

    • Pry along the laptop frame until the back panel comes loose.

    • Do not pull the back panel too hard as the battery is still connected to the back panel and the motherboard. This can damage your device.

  4. Acer Aspire One Cloudbook 11 AO1-131-C7DW Back Panel Replacement: passo 4, imagem 1 %32 Acer Aspire One Cloudbook 11 AO1-131-C7DW Back Panel Replacement: passo 4, imagem 2 %32
    • Rotate the device so the opening faces you again.

    • Hold the back panel away from the laptop and remove the 4-mm screw using the PH0 screwdriver.

    • This screw is fastening the battery to the laptop.

    • Lift the back panel gently.

  5. Acer Aspire One Cloudbook 11 AO1-131-C7DW Back Panel Replacement: passo 5, imagem 1 %32 Acer Aspire One Cloudbook 11 AO1-131-C7DW Back Panel Replacement: passo 5, imagem 2 %32
    • Unplug the cable that connects the battery to the motherboard.

    • Detach the back panel, which still includes the battery.

Conclusão

To reassemble your device, follow these instructions in reverse order.

Uma outra pessoa concluiu este guia.

John Hasenbein

Membro desde: 09/11/17

119 Reputação

Autoria de 1 guia

Equipe

CSU Fullerton, Team S1-G4, Bruce Fall 2017 Membro de CSU Fullerton, Team S1-G4, Bruce Fall 2017

CSUF-BRUCE-F17S1G4

Membros da 3

Autoria de 6 guias

0 comentários

Adicione um comentário

Exibir estatísticas:

Últimas 24 horas: 0

Últimos 7 dias: 1

Últimos 30 dias: 1

Duração total: 957