Ir para o conteúdo principal

Acer Aspire ES1-711-P1UV Screen Replacement

O que você precisa

  1. Acer Aspire ES1-711-P1UV Screen Replacement, Battery: passo 1, imagem 1 %32
    • Place the laptop face down on a flat, clean surface.

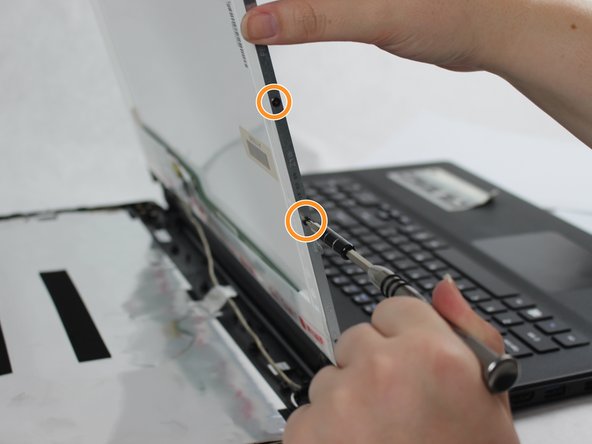
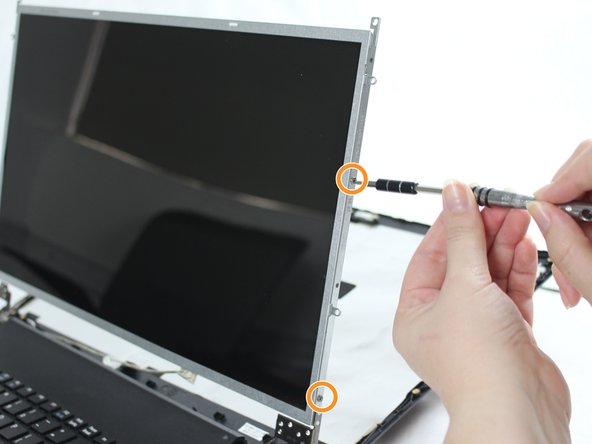
    • Remove all twenty-seven 7 mm screws on the back cover of the laptop with a Phillips #0 screwdriver. Screws are circled in red on the diagram.

  2. Acer Aspire ES1-711-P1UV Screen Replacement: passo 2, imagem 1 %32
    • Use the iFixit opening tool to pry open the four corners of the back cover of the laptop. You may need to use your hands to fully remove the cover.

    • Be sure to evenly apply pressure when removing the back cover.

  3. Acer Aspire ES1-711-P1UV Screen Replacement: passo 3, imagem 1 %32
    • Remove the two 5 mm screws located on either side of the battery.

  4. Acer Aspire ES1-711-P1UV Screen Replacement: passo 4, imagem 1 %32
    • Disconnect the colored bundled cable connectors from the motherboard. To do this, pull on the wires to disconnect the cable and remove the battery.

  5. Acer Aspire ES1-711-P1UV Screen Replacement, Screen: passo 5, imagem 1 %32 Acer Aspire ES1-711-P1UV Screen Replacement, Screen: passo 5, imagem 2 %32
    • Place the laptop on a flat surface and open it to see the screen.

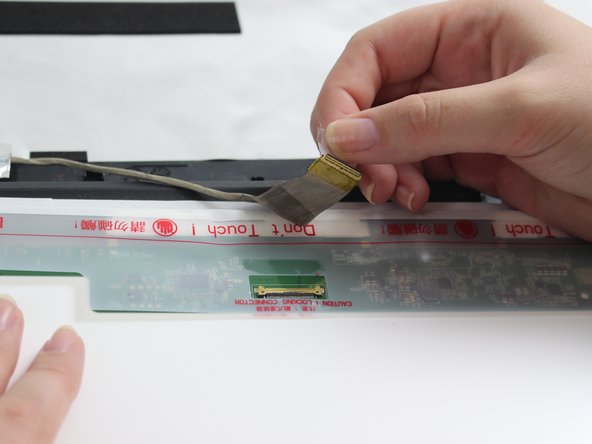
    • Using your fingers or a plastic opening tool, pry open the bezel that holds the screen in place.

  6. Acer Aspire ES1-711-P1UV Screen Replacement: passo 6, imagem 1 %32 Acer Aspire ES1-711-P1UV Screen Replacement: passo 6, imagem 2 %32 Acer Aspire ES1-711-P1UV Screen Replacement: passo 6, imagem 3 %32
    • Use the Phillips #0 screwdriver to remove the fourteen 5mm screws around the screen.

    • Use the Phillips #0 screwdriver to remove the four 4mm screws holding in the screen.

    • Before unscrewing the screen, place a paper on the keyboard to protect the screen from scratches.

  7. Acer Aspire ES1-711-P1UV Screen Replacement: passo 7, imagem 1 %32 Acer Aspire ES1-711-P1UV Screen Replacement: passo 7, imagem 2 %32
    • With the screen on the paper, detach the Zero Insertion Force (ZIF) connector attaching the screen to the video cable inside of the front cover.

    • To remove the ZIF use your finger to flip up the top cover and gently pull the cable out.

    • Be sure to pry open the hinged flap not the connector socket

    • Gently remove the screen from laptop.

Conclusão

To reassemble your device, follow these instructions in reverse order.

Uma outra pessoa concluiu este guia.

0 comentários

Adicione um comentário

Exibir estatísticas:

Últimas 24 horas: 1

Últimos 7 dias: 4

Últimos 30 dias: 5

Duração total: 819