Introdução
This guide will help you remove your RAM so it can be replaced. Replacing your RAM may improve the amount of background memory on your laptop. With this, your laptop will run faster, allow more tabs to be opened, and increase memory. You may need a new RAM if your laptop is slow in loading new pages, and becomes slower with multiple tabs.
O que você precisa
-
-
Place the laptop face down on a flat, clean surface.
-
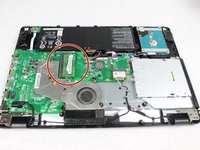
Remove all twenty-seven 7 mm screws on the back cover of the laptop with a Phillips #0 screwdriver. Screws are circled in red on the diagram.
-
-
-
-
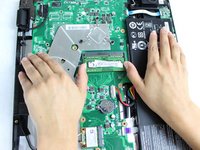
Locate RAM and push metal clips outwards to release RAM. The RAM will eject at a 30 degree angle.
-
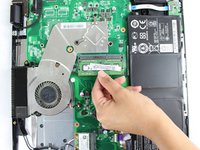
Slide the RAM out of the clips to remove.
-


To reassemble your device, follow these instructions in reverse order.
To reassemble your device, follow these instructions in reverse order.
Cancelar: não concluí este guia.
Uma outra pessoa concluiu este guia.
Equipe

Sam Houston State, Team S17-G3, Blackburne Winter 2018 Membro de Sam Houston State, Team S17-G3, Blackburne Winter 2018
SHSU-BLACKBURNE-W18S17G3
1 Membro
Autoria de 2 guias