Ir para o conteúdo principal

Acer Aspire ES1-111M-C7DE Screen Replacement

O que você precisa

  1. Acer Aspire ES1-111M-C7DE Screen Replacement, Screen: passo 1, imagem 1 %32 Acer Aspire ES1-111M-C7DE Screen Replacement, Screen: passo 1, imagem 2 %32 Acer Aspire ES1-111M-C7DE Screen Replacement, Screen: passo 1, imagem 3 %32
    • Open the laptop screen to the farthest back position

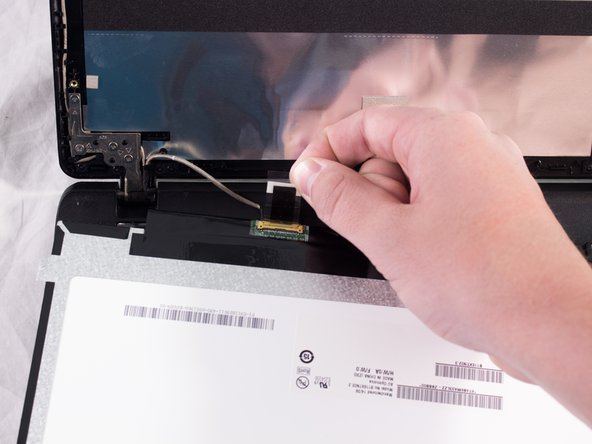
    • Using the plastic opening tool, pry off the screen border and completely remove it.

  2. Acer Aspire ES1-111M-C7DE Screen Replacement: passo 2, imagem 1 %32 Acer Aspire ES1-111M-C7DE Screen Replacement: passo 2, imagem 2 %32
    • •Using the JIS #1 screwdriver, remove the 4 3mmscrews from each corner of the screen

  3. Acer Aspire ES1-111M-C7DE Screen Replacement: passo 3, imagem 1 %32
    • Remove the screen and turn it face down

  4. Acer Aspire ES1-111M-C7DE Screen Replacement: passo 4, imagem 1 %32 Acer Aspire ES1-111M-C7DE Screen Replacement: passo 4, imagem 2 %32
    • Carefully pull back the tape on the connector until the connector is fully revealed

  5. Acer Aspire ES1-111M-C7DE Screen Replacement: passo 5, imagem 1 %32
    • Carefully remove the connector from the old screen and connect it to your new, compatible screen

Conclusão

To reassemble your device, follow these instructions in reverse order starting from Step 3.

2 outras pessoas executaram este guia.

Timothy Carney

Membro desde: 09/25/17

135 Reputação

Autoria de 1 guia

Equipe

USF Tampa, Team S3-G1, Cannon Fall 2017 Membro de USF Tampa, Team S3-G1, Cannon Fall 2017

USFT-CANNON-F17S3G1

Membros da 4

Autoria de 6 guias

0 comentários

Adicione um comentário

Exibir estatísticas:

Últimas 24 horas: 0

Últimos 7 dias: 0

Últimos 30 dias: 9

Duração total: 377