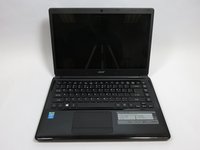
Ir para o conteúdo principal

Acer Aspire E1-470P-6659 Hard Drive Replacement

O que você precisa

  1. Acer Aspire E1-470P-6659 Hard Drive Replacement, Battery: passo 1, imagem 1 %32
    • Turn off the laptop and disconnect all device cords.

  2. Acer Aspire E1-470P-6659 Hard Drive Replacement: passo 2, imagem 1 %32
    • Flip the laptop over so the bottom is facing you.

  3. Acer Aspire E1-470P-6659 Hard Drive Replacement: passo 3, imagem 1 %32 Acer Aspire E1-470P-6659 Hard Drive Replacement: passo 3, imagem 2 %32 Acer Aspire E1-470P-6659 Hard Drive Replacement: passo 3, imagem 3 %32
    • Use your finger or a spuger to pull the battery release switch.

  4. Acer Aspire E1-470P-6659 Hard Drive Replacement: passo 4, imagem 1 %32 Acer Aspire E1-470P-6659 Hard Drive Replacement: passo 4, imagem 2 %32 Acer Aspire E1-470P-6659 Hard Drive Replacement: passo 4, imagem 3 %32
    • Remove the battery from the laptop.

  5. Acer Aspire E1-470P-6659 Hard Drive Replacement, Hard Drive: passo 5, imagem 1 %32 Acer Aspire E1-470P-6659 Hard Drive Replacement, Hard Drive: passo 5, imagem 2 %32
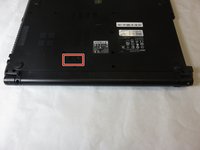
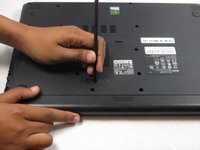
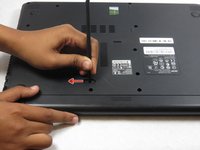
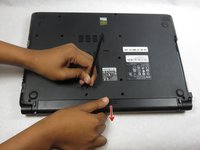
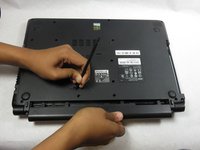
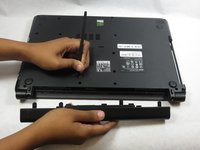
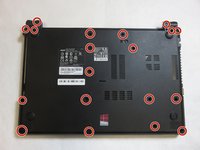
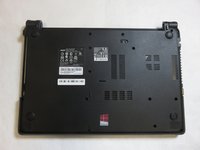
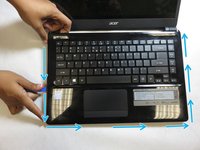
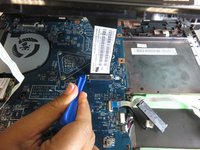
    • Remove nineteen screws from the back panel using a Phillips #0 Screwdriver .

  6. Acer Aspire E1-470P-6659 Hard Drive Replacement: passo 6, imagem 1 %32 Acer Aspire E1-470P-6659 Hard Drive Replacement: passo 6, imagem 2 %32 Acer Aspire E1-470P-6659 Hard Drive Replacement: passo 6, imagem 3 %32
    • Run the plastic opening tool across from one corner to another along the edge.

    • Separate the keyboard panel gently.

    • Lift the keyboard slowly from the laptop but do not lift completely because there are ribbon cables attached.

  7. Acer Aspire E1-470P-6659 Hard Drive Replacement: passo 7, imagem 1 %32 Acer Aspire E1-470P-6659 Hard Drive Replacement: passo 7, imagem 2 %32
    • Disconnect the two keyboard assembly ribbon cables from motherboard.

    • To release small ribbon cable, use spudger or fingers to flip gray bar along edge over.

    • To release larger ribbon cable, use pry tool or spudger to slide white plastic clip forward.

  8. Acer Aspire E1-470P-6659 Hard Drive Replacement: passo 8, imagem 1 %32
    • Pull up the release tab beside the hard drive.

    • Disconnect portion of ribbon cable that is covering the hard drive.

    • Handle the ribbon carefully. Do not break the metal contact.

    • While reconnecting the ribbon after replacing a new hard drive, face the blue side with a label up. Make sure the black line beside the sticker is not crooked, so that the ribbon is tight.

  9. Acer Aspire E1-470P-6659 Hard Drive Replacement: passo 9, imagem 1 %32
    • Remove the hard drive screw using Phillips #0 Screwdriver.

  10. Acer Aspire E1-470P-6659 Hard Drive Replacement: passo 10, imagem 1 %32
    • Pull the hard drive out gently. Be aware that it is connected to the adapter.

    • Gently remove adapter by pulling on both ends simultaneously to separate it from the hard drive.

Conclusão

To reassemble your device, follow these instructions in reverse order.

3 outras pessoas executaram este guia.

Siyu Jia

Membro desde: 10/22/18

196 Reputação

Autoria de 1 guia

Equipe

UC Davis, Team S4-G5, Lore Fall 2018 Membro de UC Davis, Team S4-G5, Lore Fall 2018

UCD-LORE-F18S4G5

Membros da 3

Autoria de 5 guias

Um comentário

Very detail and work for my laptop

Kusuma Wijaya - Responder

Adicione um comentário

Exibir estatísticas:

Últimas 24 horas: 0

Últimos 7 dias: 4

Últimos 30 dias: 8

Duração total: 1,272