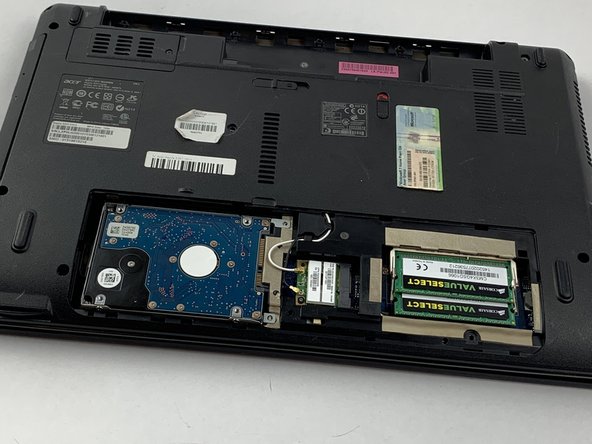
Ir para o conteúdo principal

Acer Aspire 5251-1513 Hard Drive Replacement

O que você precisa

  1. Acer Aspire 5251-1513 Hard Drive Replacement, Battery: passo 1, imagem 1 %32
    • Turn over the laptop so the back is facing up.

  2. Acer Aspire 5251-1513 Hard Drive Replacement: passo 2, imagem 1 %32 Acer Aspire 5251-1513 Hard Drive Replacement: passo 2, imagem 2 %32
    • Next to the battery is a switch with a lock symbol on it.

    • Unlock the switch by sliding it to reveal a red unlock symbol.

  3. Acer Aspire 5251-1513 Hard Drive Replacement: passo 3, imagem 1 %32 Acer Aspire 5251-1513 Hard Drive Replacement: passo 3, imagem 2 %32
    • Pull the other switch completely while the red unlock symbol is still present. The battery pack should pop up a bit.

  4. Acer Aspire 5251-1513 Hard Drive Replacement: passo 4, imagem 1 %32 Acer Aspire 5251-1513 Hard Drive Replacement: passo 4, imagem 2 %32
    • Remove the battery pack via the indentation at the top of the battery in between the two switches.

  5. Acer Aspire 5251-1513 Hard Drive Replacement, Hard Drive: passo 5, imagem 1 %32
    • Unscrew the two 8.6 mm screws using a Phillips #0 screwdriver.

  6. Acer Aspire 5251-1513 Hard Drive Replacement: passo 6, imagem 1 %32 Acer Aspire 5251-1513 Hard Drive Replacement: passo 6, imagem 2 %32
    • Use a spudger or plastic opening tool to lift the panel up. Then remove the panel entirely with your hands.

  7. Acer Aspire 5251-1513 Hard Drive Replacement: passo 7, imagem 1 %32 Acer Aspire 5251-1513 Hard Drive Replacement: passo 7, imagem 2 %32
    • Slide the hard drive to the left until it clicks and then pull it out completely.

  8. Acer Aspire 5251-1513 Hard Drive Replacement: passo 8, imagem 1 %32 Acer Aspire 5251-1513 Hard Drive Replacement: passo 8, imagem 2 %32 Acer Aspire 5251-1513 Hard Drive Replacement: passo 8, imagem 3 %32
    • Unscrew the four 3.6 mm screws on either side of the casing with the Phillips #0 screwdriver.

    • Remove the hard drive out of its casing.

    • Be Gentle with the hard rive, only touch the edges.

Conclusão

To reassemble your device, follow these instructions in reverse order.

Uma outra pessoa concluiu este guia.

Gicely Rodriguez

Membro desde: 02/14/19

1.029 Reputação

Autoria de 5 guias

Equipe

USF Tampa, Team S1-G6, Leahy Spring 2019 Membro de USF Tampa, Team S1-G6, Leahy Spring 2019

USFT-LEAHY-S19S1G6

Membros da 4

Autoria de 5 guias

0 comentários

Adicione um comentário

Exibir estatísticas:

Últimas 24 horas: 0

Últimos 7 dias: 8

Últimos 30 dias: 10

Duração total: 574