Ir para o conteúdo principal

Acer Aspire 4810TZ-4120 Screen Replacement

O que você precisa

  1. Acer Aspire 4810TZ-4120 Screen Replacement, Battery: passo 1, imagem 1 %32
    • Unlock the battery by pushing and holding the lock button.

  2. Acer Aspire 4810TZ-4120 Screen Replacement: passo 2, imagem 1 %32 Acer Aspire 4810TZ-4120 Screen Replacement: passo 2, imagem 2 %32
    • While holding the lock button, pull out the battery

    • The battery is now ready to be replaced with a new one

  3. Acer Aspire 4810TZ-4120 Screen Replacement, Screen: passo 3, imagem 1 %32 Acer Aspire 4810TZ-4120 Screen Replacement, Screen: passo 3, imagem 2 %32
    • Locate and remove the four (4) pads using Angled Tweezers

  4. Acer Aspire 4810TZ-4120 Screen Replacement: passo 4, imagem 1 %32 Acer Aspire 4810TZ-4120 Screen Replacement: passo 4, imagem 2 %32
    • Remove the four screws that were under the pads

  5. Acer Aspire 4810TZ-4120 Screen Replacement: passo 5, imagem 1 %32 Acer Aspire 4810TZ-4120 Screen Replacement: passo 5, imagem 2 %32 Acer Aspire 4810TZ-4120 Screen Replacement: passo 5, imagem 3 %32
    • Carefully pull the bevel (frame) off of the screen

  6. Acer Aspire 4810TZ-4120 Screen Replacement: passo 6, imagem 1 %32 Acer Aspire 4810TZ-4120 Screen Replacement: passo 6, imagem 2 %32 Acer Aspire 4810TZ-4120 Screen Replacement: passo 6, imagem 3 %32
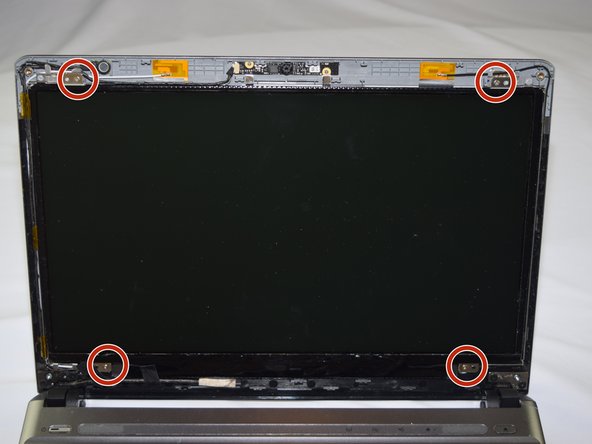
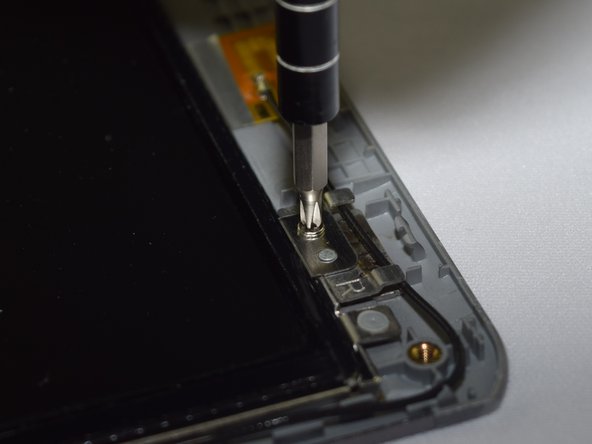
    • Locate the four screws that are holding the screen in place

    • Remove the screws

  7. Acer Aspire 4810TZ-4120 Screen Replacement: passo 7, imagem 1 %32 Acer Aspire 4810TZ-4120 Screen Replacement: passo 7, imagem 2 %32
    • Pull the screen out gently

    • Lay the screen down on the keyboard

  8. Acer Aspire 4810TZ-4120 Screen Replacement: passo 8, imagem 1 %32 Acer Aspire 4810TZ-4120 Screen Replacement: passo 8, imagem 2 %32
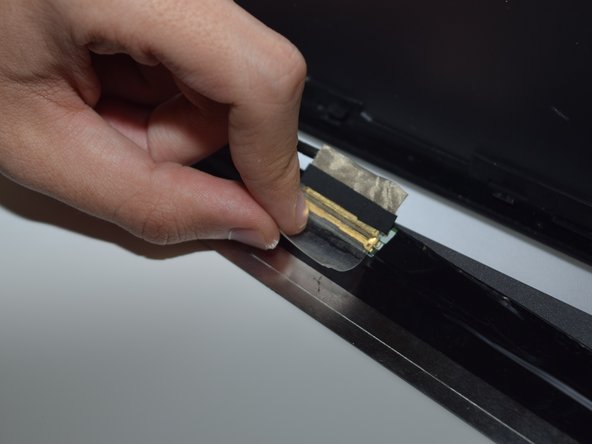
    • Locate the connector between the screen and the computer

    • Remove any tape

  9. Acer Aspire 4810TZ-4120 Screen Replacement: passo 9, imagem 1 %32
    • Gently pull the connector off of the screen

    • The screen can now be replaced with a new one

Conclusão

To reassemble your device, follow these instructions in reverse order.

0 comentários

Adicione um comentário

Exibir estatísticas:

Últimas 24 horas: 0

Últimos 7 dias: 2

Últimos 30 dias: 6

Duração total: 467