Ir para o conteúdo principal

ASUS Q400A-BHI7N03 Power Jack Replacement

O que você precisa

  1. ASUS Q400A-BHI7N03 Power Jack Replacement, Power Jack: passo 1, imagem 1 %32
    • Flip laptop over with the battery facing toward you.

    • Slide both tabs with the lock/unlock symbol, near the battery on the right of the notebook, to the unlock position.

    • Grab the top edge of the battery & lift upward to relieve the battery from its slot.

  2. ASUS Q400A-BHI7N03 Power Jack Replacement: passo 2, imagem 1 %32
    • Remove the one black 8mm Phillips #0 screw.

    • Lift and remove the bottom cover panel using the plastic opening tool.

  3. ASUS Q400A-BHI7N03 Power Jack Replacement: passo 3, imagem 1 %32
    • Remove the four 8mm Phillips #0 screws.

    • Lift and remove the drive.

  4. ASUS Q400A-BHI7N03 Power Jack Replacement: passo 4, imagem 1 %32
    • Remove the single silver 8mm Phillips #0 screw.

    • Remove the three 8mm Phillips #0 screws.

  5. ASUS Q400A-BHI7N03 Power Jack Replacement: passo 5, imagem 1 %32
    • Remove the seven black 8mm Phillips #0 screws around the perimeter.

    • Remove the two silver 8mm Phillips #0 screws that are under the battery.

  6. ASUS Q400A-BHI7N03 Power Jack Replacement: passo 6, imagem 1 %32
    • Flip the device right-side up and pry up the keyboard and touchpad gently using both hands.

  7. ASUS Q400A-BHI7N03 Power Jack Replacement: passo 7, imagem 1 %32
    • Release the ZIF (zero insertion force) connector using a plastic spudger.

    • Remove the ribbon cable by hand from the ZIF connector.

    • Do not use too much force when releasing the ZIF connector.

  8. ASUS Q400A-BHI7N03 Power Jack Replacement: passo 8, imagem 1 %32 ASUS Q400A-BHI7N03 Power Jack Replacement: passo 8, imagem 2 %32
    • Remove the two remaining ribbon cables as described in Step 7.

  9. ASUS Q400A-BHI7N03 Power Jack Replacement: passo 9, imagem 1 %32
    • Unscrew the two black 8mm Phillips #0 screws.

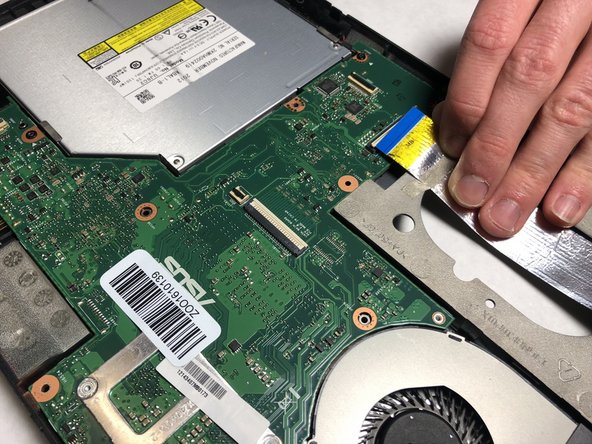
    • Firmly grasp each antenna head with a pair of blunt tweezers and detach it by lifting up straight.

    • The antenna cables are connected through small sockets. Small popping sounds when attaching and detaching the antennas are normal.

  10. ASUS Q400A-BHI7N03 Power Jack Replacement: passo 10, imagem 1 %32
    • Remove the five black 8mm Phillips #0 screws.

  11. ASUS Q400A-BHI7N03 Power Jack Replacement: passo 11, imagem 1 %32
    • Firmly grab the optical drive and remove it by sliding it out.

  12. ASUS Q400A-BHI7N03 Power Jack Replacement: passo 12, imagem 1 %32 ASUS Q400A-BHI7N03 Power Jack Replacement: passo 12, imagem 2 %32
    • Lift the motherboard gently to completely remove this component from the device.

    • Detach Audio Cable gently by hand and you have now access to replace the power jack.

Conclusão

To reassemble your device, follow these instructions in reverse order.

Uma outra pessoa concluiu este guia.

Wan Ahmad Aiman

Membro desde: 10/31/18

403 Reputação

Autoria de 2 guias

Equipe

IUPUI, Team S1-G3, Harley Fall 2018 Membro de IUPUI, Team S1-G3, Harley Fall 2018

IUPUI-HARLEY-F18S1G3

Membros da 3

Autoria de 2 guias

0 comentários

Adicione um comentário

Exibir estatísticas:

Últimas 24 horas: 0

Últimos 7 dias: 0

Últimos 30 dias: 3

Duração total: 842