Esta versão pode conter edições incorretas. Mude para o último instantâneo verificado.
O que você precisa
-
Este passo não foi traduzido. Ajude a traduzi-lo
-
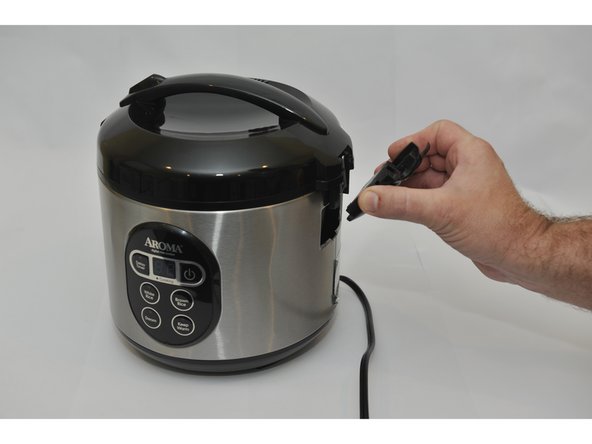
The first step is removing the condensation catcher in order to reach the control panel. We do this by pinching the condensation catcher as shown, on both sides and pull the condensation catcher away from the cooker.
-
-
Este passo não foi traduzido. Ajude a traduzi-lo
-
Once the condensation catcher has been removed, set it aside for reassembly later.
-
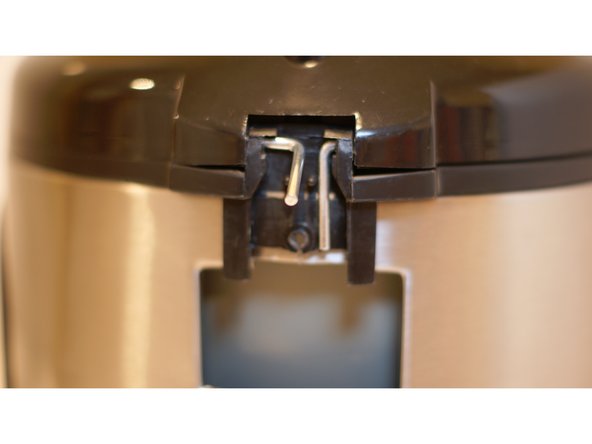
Now make sure you have a a Phillips head screwdriver, size PH2. This tool will allow you to remove the screw that was behind the condensation catcher.
-
-
-
Este passo não foi traduzido. Ajude a traduzi-lo
-
Gently remove the piece that was held in place by the screw, you do this by pulling out from the top, then pulling up. This will expose the hinges for the lid.
-
-
Este passo não foi traduzido. Ajude a traduzi-lo
-
To remove the hinge, gently rotate the bottom of the rod upwards, then push inward to pull the rod out. Repeat the process for each rod. This will allow the lid to be removed.
-


Cancelar: não concluí este guia.
Uma outra pessoa concluiu este guia.
Equipe

USF Tampa, Team 2-3, Sullivan Fall 2015 Membro de USF Tampa, Team 2-3, Sullivan Fall 2015
USFT-SULLIVAN-F15S2G3
Membros da 3
Autoria de 8 guias