Esta versão pode conter edições incorretas. Mude para o último instantâneo verificado.
O que você precisa
-
Este passo não foi traduzido. Ajude a traduzi-lo
-
To begin, locate the two 4.9mm Phillips #00 screws at the top corners of the case and remove them.
-
-
-
Este passo não foi traduzido. Ajude a traduzi-lo
-
Squeeze the plastic opening tool in between the seam where the screen joins the plastic case.
-
Begin separating the bottom of the case from the screen by carefully going around the whole edge of the case and slowly prying it apart.
-
-
Este passo não foi traduzido. Ajude a traduzi-lo
-
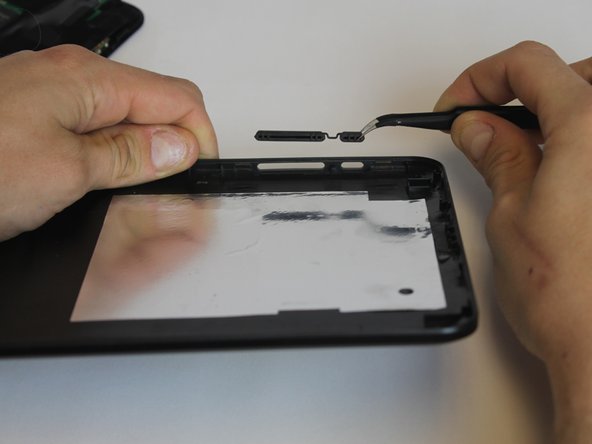
Carefully place the bottom lid next to the screen case. The power/speaker buttons should be visible at the corner of the lid. Remove the buttons with the tweezers.
-


Equipe

USF Tampa, Team 9-1, Leahy Winter 2015 Membro de USF Tampa, Team 9-1, Leahy Winter 2015
USFT-LEAHY-W15S9G1
Membros da 3
Autoria de 9 guias