Ir para o conteúdo principal

4Sight 9 Battery Replacement

O que você precisa

  1. 4Sight 9 Battery Replacement, Cover: passo 1, imagem 1 %32 4Sight 9 Battery Replacement, Cover: passo 1, imagem 2 %32
    • Place the tablet on its side so that the two screws are facing upward.

    • Remove two 1 mm screws from the left side of the tablet using a Phillips #00 screwdriver.

  2. 4Sight 9 Battery Replacement: passo 2, imagem 1 %32
    • Pry the case away from the device slowly by sliding a plastic opening tool along the device.

    • Once loosened, use your hands to separate the case from the device.

  3. 4Sight 9 Battery Replacement: passo 3, imagem 1 %32 4Sight 9 Battery Replacement: passo 3, imagem 2 %32
    • Hold the positive and negative wires as close as possible to the speaker.

    • Use an opening tool and fingers to simultaneously lift the speaker from the cover.

  4. 4Sight 9 Battery Replacement, Battery: passo 4, imagem 1 %32
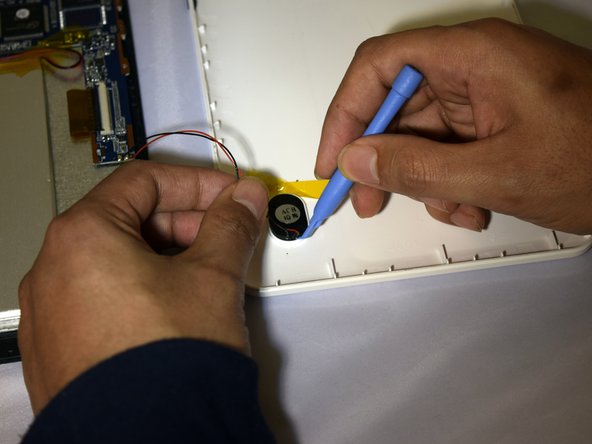
    • Use soldering gun to remove the positive and negative wires connecting the battery to the circuit board.

    • For a complete guide on how to solder, click here.

  5. 4Sight 9 Battery Replacement: passo 5, imagem 1 %32 4Sight 9 Battery Replacement: passo 5, imagem 2 %32
    • Insert plastic prying tool under upper-hand corner of battery and slide back and forth.

    • Once loosened, insert plastic prying tool under lower-hand corner and repeat sliding action.

    • Repeat previous actions until battery comes loose from device.

Conclusão

To reassemble your device, follow these instructions in reverse order.

7 outras pessoas executaram este guia.

0 comentários

Adicione um comentário

Exibir estatísticas:

Últimas 24 horas: 0

Últimos 7 dias: 3

Últimos 30 dias: 10

Duração total: 1,644