Ir para o conteúdo principal

2015-2019 Dodge Charger Tail Light Replacement

O que você precisa

  1. 2015-2019 Dodge Charger Tail Light Replacement, Tail Light: passo 1, imagem 1 %32
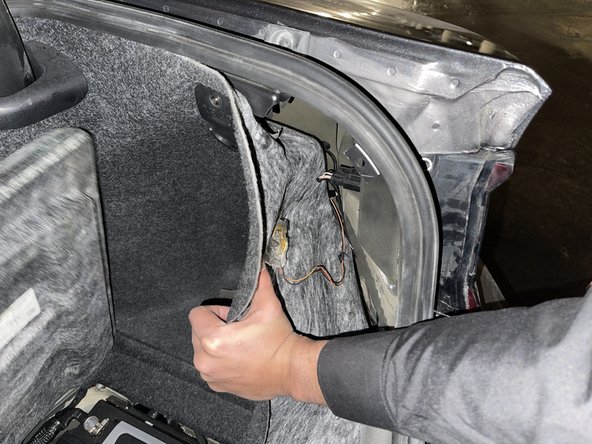
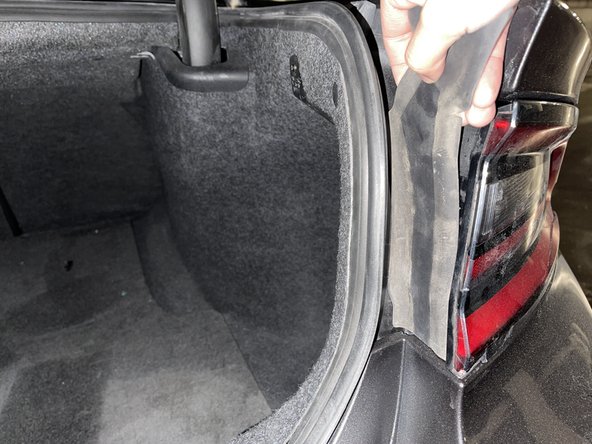
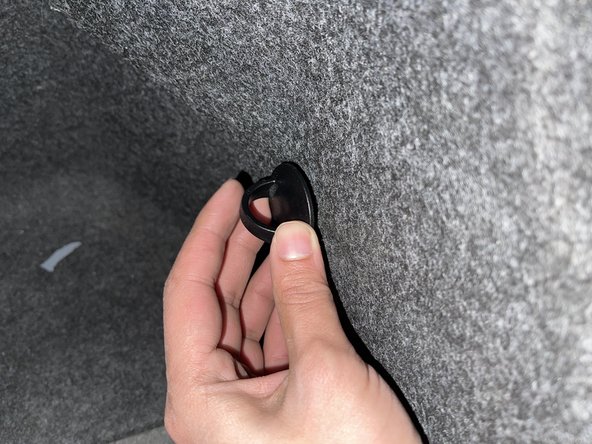
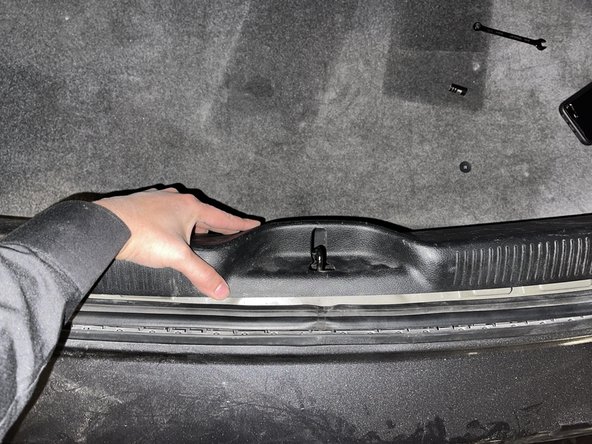
    • Remove the rear plastic panel cover located inside the trunk by pushing the panel towards the center of the car.

  2. 2015-2019 Dodge Charger Tail Light Replacement: passo 2, imagem 1 %32 2015-2019 Dodge Charger Tail Light Replacement: passo 2, imagem 2 %32
    • Remove the plastic screw securing the inner lining of the trunk by pulling outwards.

    • Do not use excess force as it can damage the screw.

  3. 2015-2019 Dodge Charger Tail Light Replacement: passo 3, imagem 1 %32 2015-2019 Dodge Charger Tail Light Replacement: passo 3, imagem 2 %32
    • Remove the plastic pin by prying it outwards using a pry bar to free the inner lining.

    • Pull back the inner lining to gain access to the screws securing the tail lights in place.

  4. 2015-2019 Dodge Charger Tail Light Replacement: passo 4, imagem 1 %32 2015-2019 Dodge Charger Tail Light Replacement: passo 4, imagem 2 %32 2015-2019 Dodge Charger Tail Light Replacement: passo 4, imagem 3 %32
    • Remove both 8 mm nuts securing the tail lights in place using an 8 mm wrench.

    • Remove the nuts carefully as they may fall between the gaps which can be difficult to reach.

  5. 2015-2019 Dodge Charger Tail Light Replacement: passo 5, imagem 1 %32
    • Remove the connector by squeezing both sides and pulling outwards.

  6. 2015-2019 Dodge Charger Tail Light Replacement: passo 6, imagem 1 %32 2015-2019 Dodge Charger Tail Light Replacement: passo 6, imagem 2 %32
    • Remove the plastic cover by pulling outwards so that the tail light can slide out.

  7. 2015-2019 Dodge Charger Tail Light Replacement: passo 7, imagem 1 %32 2015-2019 Dodge Charger Tail Light Replacement: passo 7, imagem 2 %32
    • Grab both sides of the tail light firmly and pull it out.

  8. 2015-2019 Dodge Charger Tail Light Replacement: passo 8, imagem 1 %32
    • Slide the replacement tail light back in firmly.

  9. 2015-2019 Dodge Charger Tail Light Replacement: passo 9, imagem 1 %32 2015-2019 Dodge Charger Tail Light Replacement: passo 9, imagem 2 %32 2015-2019 Dodge Charger Tail Light Replacement: passo 9, imagem 3 %32
    • Insert the connector back to the tail light.

    • Screw the 8 mm nuts onto the bolts by hand before tightening with a 8 mm wrench.

  10. 2015-2019 Dodge Charger Tail Light Replacement: passo 10, imagem 1 %32 2015-2019 Dodge Charger Tail Light Replacement: passo 10, imagem 2 %32 2015-2019 Dodge Charger Tail Light Replacement: passo 10, imagem 3 %32
    • Push the plastic pin back into the hole to secure the side inner lining.

    • Push the plastic screw back into the hole to secure the bottom inner lining.

    • Push the rear plastic panel cover back on.

  11. 2015-2019 Dodge Charger Tail Light Replacement: passo 11, imagem 1 %32
    • Start the vehicle to test if the tail light works.

Conclusão

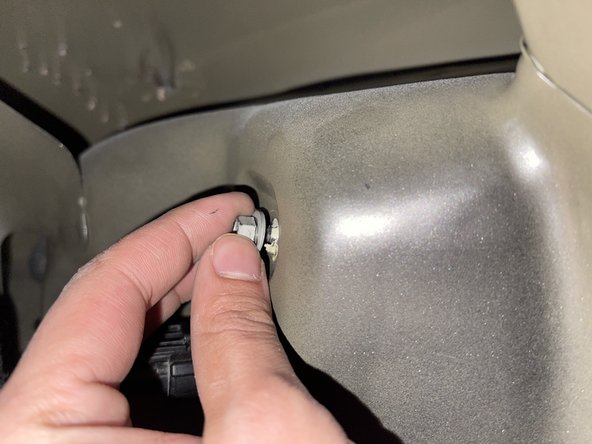
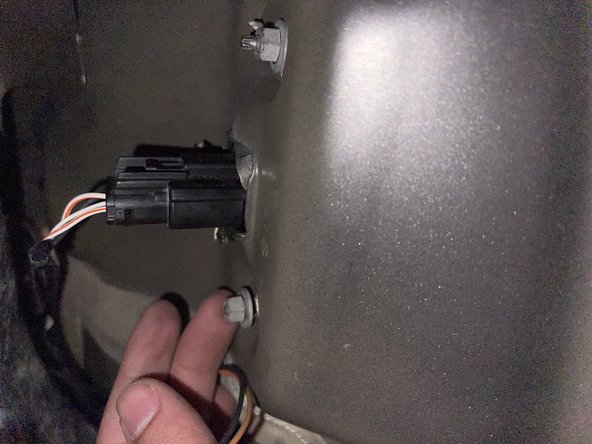
Repeat the same steps to replace the other tail light.

Uma outra pessoa concluiu este guia.

Asad Raza

Membro desde: 01/17/22

217 Reputação

Autoria de 1 guia

Equipe

0 comentários

Adicione um comentário

Exibir estatísticas:

Últimas 24 horas: 8

Últimos 7 dias: 30

Últimos 30 dias: 111

Duração total: 3,969