Esta versão pode conter edições incorretas. Mude para o último instantâneo verificado.
O que você precisa
-
Este passo não foi traduzido. Ajude a traduzi-lo
-
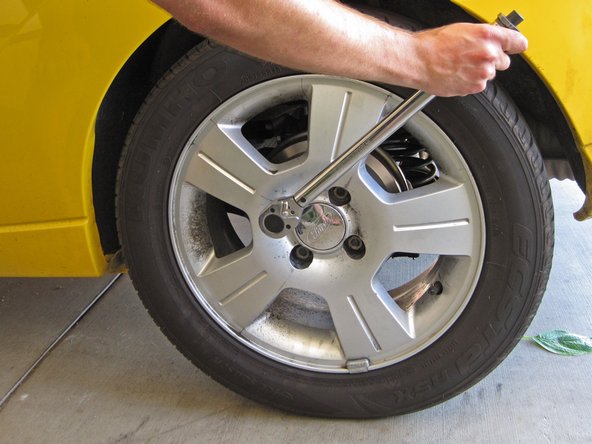
Jack up the rear of the car and place it on jack stands. Remove the rear wheels and chock the front wheels.
-
Open the hood and locate the brake fluid reservoir.
-
Remove the cap from the brake fluid reservoir and set it aside.
-
Use a turkey baster to remove 2-3 ounces of brake fluid from the reservoir to prevent overflow when working on the brakes.
-
-
Este passo não foi traduzido. Ajude a traduzi-lo
-
If you are replacing the brake drums, then follow the appropriate directions for your replacement part: with or without the bearing installed. If you are not replacing the drums, keep in mind that the rear wheel hub bolt that holds the bearing in place must be torqued to 175 ft-lbs.
-
-
Este passo não foi traduzido. Ajude a traduzi-lo
-
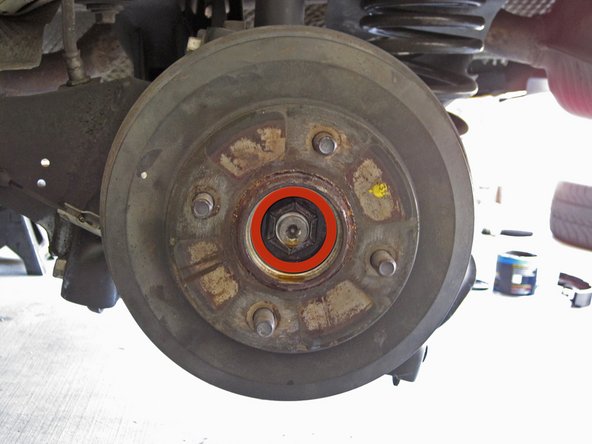
Use a mallet and a flat head screwdriver to make a small indentation along the edge of the wheel bearing dust cap.
-
Pry the dust cap out of the brake drum with the flat head screwdriver.
-
Remove the 29 mm rear hub bolt nut from the brake drum. This will require either a breaker bar or an impact wrench.
-
-
Este passo não foi traduzido. Ajude a traduzi-lo
-
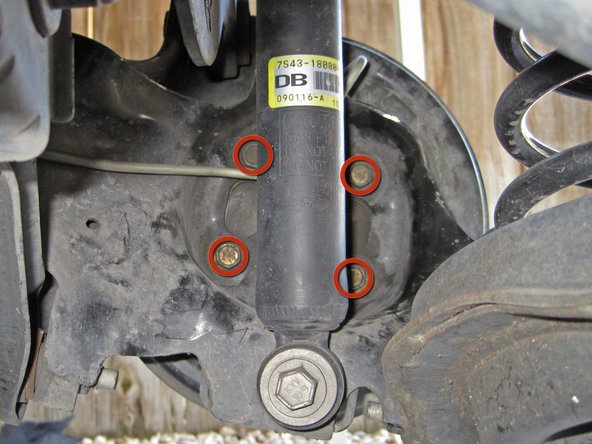
Use a socket wrench with a swivel adapter to remove the four 13 mm bolts from the back of the hub assembly.
-
-
Este passo não foi traduzido. Ajude a traduzi-lo
-
Pull the brake drum straight away from the hub assembly to remove it.
-
-
Este passo não foi traduzido. Ajude a traduzi-lo
-
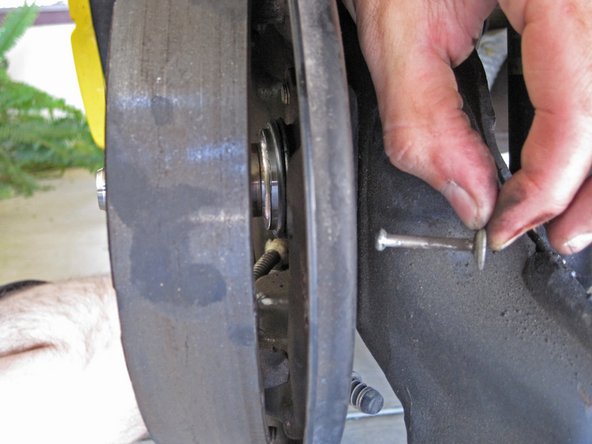
Use a flat head screwdriver to remove the two brake shoe retaining clips.
-
Pull the small retaining pins out from the back side of the hub assembly.
-
-
Este passo não foi traduzido. Ajude a traduzi-lo
-
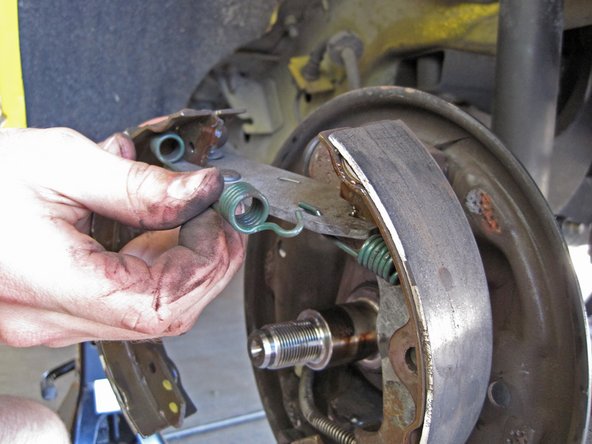
Pull the brake shoe assembly off the backing plate.
-
Remove the two springs from the top and bottom of the brake shoes that hold the leading (front) and trailing (rear) shoes together.
-
Remove the leading brake shoe.
-
-
-
Este passo não foi traduzido. Ajude a traduzi-lo
-
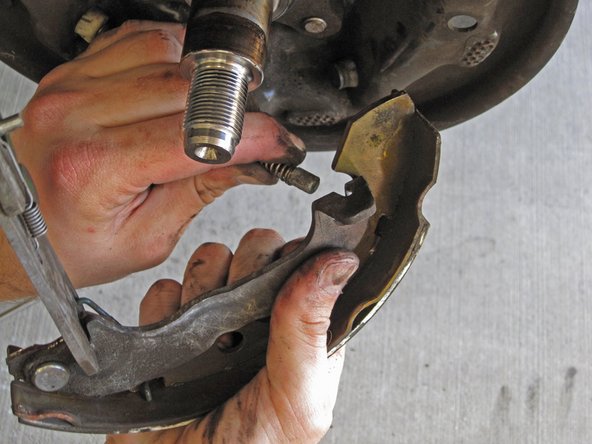
Remove the emergency brake cable from the trailing brake shoe by feeding it through its hole in the trailing shoe.
-
-
Este passo não foi traduzido. Ajude a traduzi-lo
-
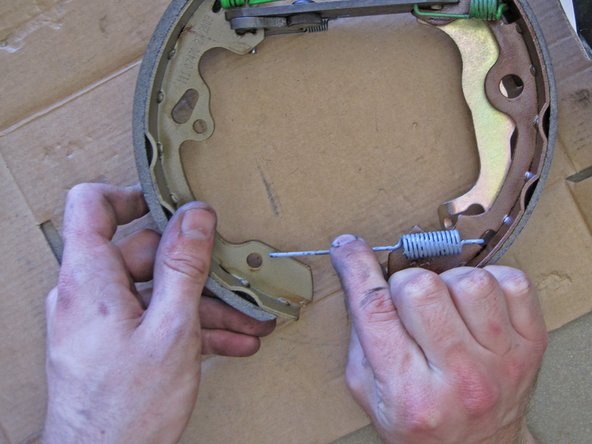
Use a pair of needle nose pliers to remove the small spring that holds the trailing brake shoe to the metal spacer.
-
Remove the trailing brake shoe from the spacer.
-
-
Este passo não foi traduzido. Ajude a traduzi-lo
-
Use an aerosol brake cleaner to clean all of the dirt and brake dust from the hub assembly.
-
-
Este passo não foi traduzido. Ajude a traduzi-lo
-
Apply a generous amount white lithium grease to the six rub points on the backing plate.
-
-
Este passo não foi traduzido. Ajude a traduzi-lo
-
Reassemble the brake shoe assembly with your new brake shoes and hardware.
-
-
Este passo não foi traduzido. Ajude a traduzi-lo
-
Attach the emergency brake cable to the trailing shoe by feeding it through its hole in the trailing shoe.
-
The cable only fits in one orientation. Be patient and keep working at it until it is seated correctly.
-
-
Este passo não foi traduzido. Ajude a traduzi-lo
-
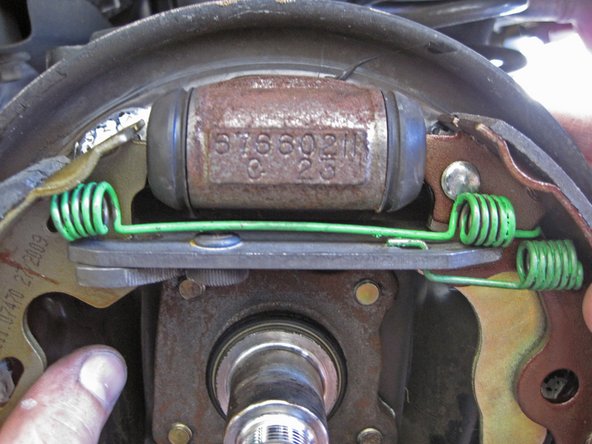
Use your hands to compress the pistons of the brake cylinder.
-
Install the brake shoe assembly, being sure that the tops of the shoes are seated correctly on the pistons.
-
Spread the brake shoes far enough apart that the bottoms of the shoes sit on either side of the adjuster.
-
-
Este passo não foi traduzido. Ajude a traduzi-lo
-
Reinstall the retainers by first sliding the pins through the back of the hub assembly, and then into the clips.
-
-
Este passo não foi traduzido. Ajude a traduzi-lo
-
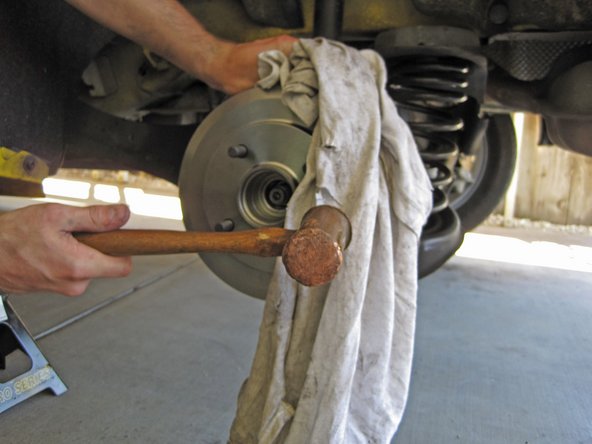
Place the brake drum back on the hub.
-
Use a rubber mallet to knock the brake drum into place over the shoes.
-
-
Este passo não foi traduzido. Ajude a traduzi-lo
-
If you removed the wheel bearing with the brake drum, reinstall the rear hub nut.
-
Reinstall the wheel bearing dust cap.
-
If you removed the brake drum by itself, reinstall the four retaining bolts on the back of the hub assembly.
-
-
Este passo não foi traduzido. Ajude a traduzi-lo
-
Place the cap back on the brake fluid reservoir.
-
Turn the key to the "on" position. Press the brake pedal a few times; it should go to the floor once, and then become firm.
-
If needed, remove the reservoir cap and add brake fluid until the level is between the "max" and "min" lines.
-
Close the hood and lower the car back to the ground.
-


Cancelar: não concluí este guia.
17 outras pessoas executaram este guia.

10 comentários
This guide should also tell you if you are installing a new drum to remove the abs sensor ring from the old drum and put it on the new one. I threw my old drum away without knowing that and now my abs light is on.
Very true: I was a given a 2005 Focus with a glowing ABS light and when I pulled the drums to inspect, sure enough: whoever replaced the drums neglected to install the sensor rings.
Here another how to that shows hub removed in case anyone else is as easily confused as me!
Is there any adjustment of the shoes?
If after four king nut removals, would Loc-tite red be adequate? Use Loc-tite blue within the four-time tightening limit?
I'm personally not sure grease is a good idea. Dust, grease/oil and don't mix well; they usually stick, more, shortly after. I don't know if this is accepted now or not. The intent is recognized, but I think the heat should also make it run very shortly.
You can easily sop up fluid from the master cylinder (m/c) with a paper towel; it's usually very little needed.
The instruction may want to add to add fluid to the m/c after pressing the brake pedal and setting the shoes.
I've never heard of drum brakes being "noisey".
Looks similar to 2008 also.