Esta versão pode conter edições incorretas. Mude para o último instantâneo verificado.
O que você precisa
-
Este passo não foi traduzido. Ajude a traduzi-lo
-
Locate the hood latch beside the driver's side door, next to the left foot rest.
-
Pull the latch toward you to release the hood.
-
-
Este passo não foi traduzido. Ajude a traduzi-lo
-
Walk around to the front of the vehicle.
-
Slide your hand under the hood, directly above the Honda emblem. Locate and pull the hood tab to unlock the hood.
-
Once the tab is released, lift the hood up.
-
-
Este passo não foi traduzido. Ajude a traduzi-lo
-
Use your left hand to hold the hood up. Locate the hood stand and pull it out of the clip.
-
Place the tip of the hood stand into the hole located in the upper left of the hood.
-
You can now let the hood rest on the stand.
-
-
Este passo não foi traduzido. Ajude a traduzi-lo
-
Use a 10 mm hex driver or socket to remove the four screws that hold the spark plug cover in place.
-
Lift the plastic cover and set it aside.
-
-
-
Este passo não foi traduzido. Ajude a traduzi-lo
-
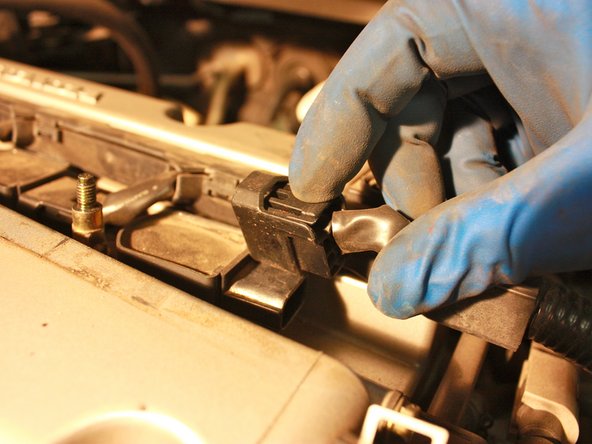
Remove the spark plug wire by pinching the locking tabs on either side of it and pulling it out.
-
-
Este passo não foi traduzido. Ajude a traduzi-lo
-
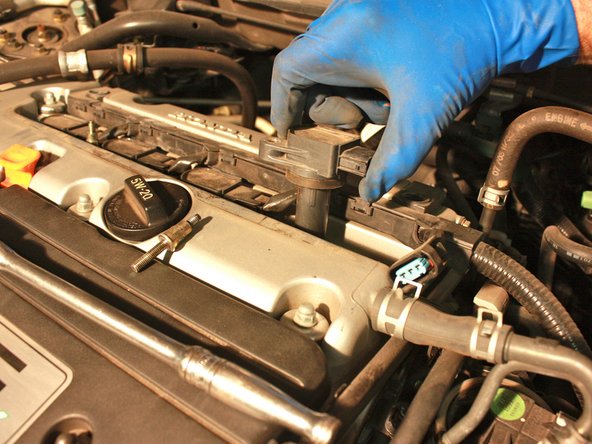
Use a 10 mm hex driver or socket to remove the four spark plug boot screws.
-
-
Este passo não foi traduzido. Ajude a traduzi-lo
-
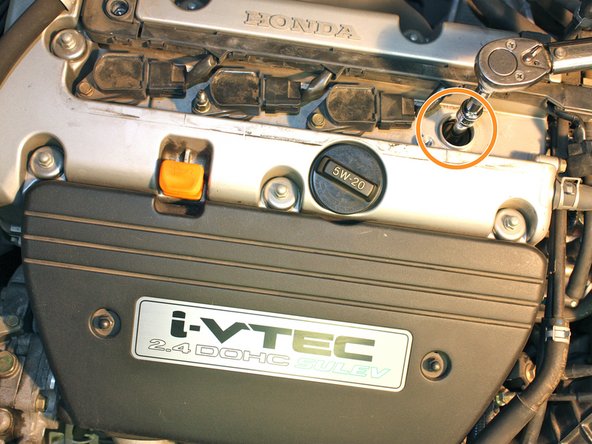
Locate the spark plug at the bottom of the bore.
-
Use a ratchet, extension, and 5/8 inch socket to remove the plug by turning counterclockwise until it's free.
-
-
Este passo não foi traduzido. Ajude a traduzi-lo
-
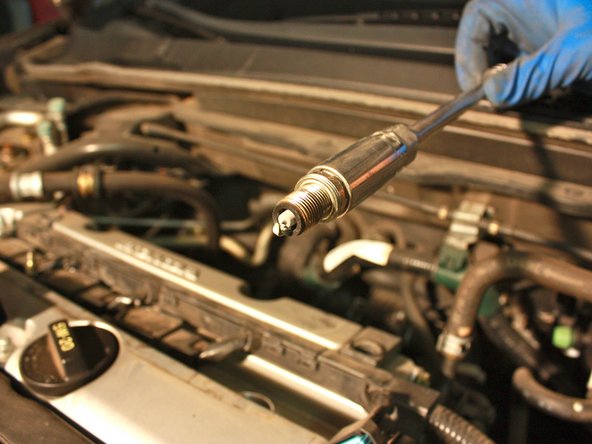
Determine if the spark plug needs to be replaced by examining the gap for the problems listed below:
-
The gap is bridged by corrosion.
-
The gap is too large.
-
The area around the gap is black and dark.
-
-
Este passo não foi traduzido. Ajude a traduzi-lo
-
If the spark plug doesn't need to be replaced, return it to the spark plug bore. If it does need to be replaced, use a new one.
-
Use a ratchet, extension, and 5/8 inch socket to tighten the spark plug by turning clockwise. Use your hand to tighten as well.
-
Repeat Steps 10-13 for the three remaining spark plugs.
-


Cancelar: não concluí este guia.
36 outras pessoas executaram este guia.
Equipe

Cal Poly, Team 24-27, Regan Fall 2012 Membro de Cal Poly, Team 24-27, Regan Fall 2012
CPSU-REGAN-F12S24G27
Membros da 4
Autoria de 22 guias
7 comentários
Great instructions! I was able to change them pretty quickly.
First rule of thumb when changing spark plugs is to do it when the engine is cold. If you don't have a torque wrench it's ok, you can still tighten them properly. Easiest thing to do is put the new plug in the spark plug socket, attach the extension (8 or 10 in. is perfect) but not the ratchet. Thread the plug in until it is snug, then attach the ratchet to tighten. Most spark plug manufacturers put on the box (especially NGK) how much to tighten. Usually if the plug has no gasket, tighten 1/16 to 1/8 of a turn. If it has a gasket, tighten 1/2 to 2/3 of a turn. For an '05 Accord 4 cyl. they have a gasket.
I appreciate the thorough and precise instructions. I would add using anti-seize on new plug threads.