Ir para o conteúdo principal

1999-2002 Suzuki SV650 Coolant Drain

Pré-requisito somente
Este guia destina-se apenas a ser usado como pré-requisito para outros guias. É incompleto por si só.

O que você precisa

  1. 1999-2002 Suzuki SV650 Coolant Drain, Coolant Drain: passo 1, imagem 1 %32 1999-2002 Suzuki SV650 Coolant Drain, Coolant Drain: passo 1, imagem 2 %32
    • Remove the radiator cap security screw with a Phillips #1 screw driver by turning it counter-clockwise.

    • Remove the radiator cap by pressing down on it and turning it counter-clockwise until it can be lifted off the radiator.

    • If your engine has been running recently, be very careful. The system may be pressurized and hot which will cause coolant to flow out through the radiator filler hole when the cap is removed.

  2. 1999-2002 Suzuki SV650 Coolant Drain: passo 2, imagem 1 %32 1999-2002 Suzuki SV650 Coolant Drain: passo 2, imagem 2 %32 1999-2002 Suzuki SV650 Coolant Drain: passo 2, imagem 3 %32
    • Locate the 10 mm hex coolant drain plug. It is on the right engine cover, just below the coolant outlet.

    • Turn the coolant drain plug counter-clockwise with a 10 mm socket wrench or box end wrench until it can be turned freely by hand.

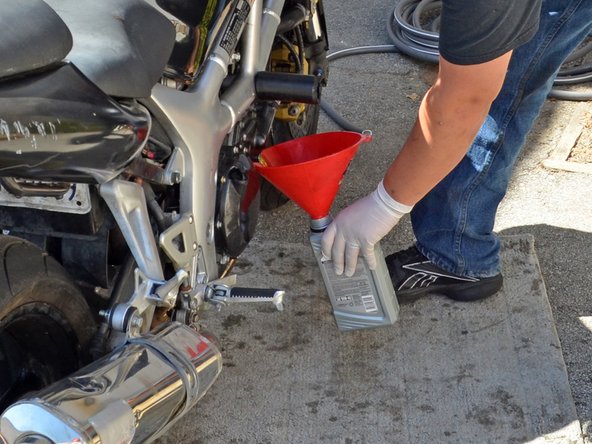
    • Place a container under the drain plug to catch the coolant when it streams out of the coolant drain hole.

    • Coolant capacity is 1.7L, ensure your container can accommodate this.

    • If you are not using a pan style container, it is recommended that you use a funnel to help prevent spills.

  3. 1999-2002 Suzuki SV650 Coolant Drain: passo 3, imagem 1 %32 1999-2002 Suzuki SV650 Coolant Drain: passo 3, imagem 2 %32
    • Finish removing the drain plug by hand and allow the coolant to drain into the container.

    • Once the draining coolant has slowed to a drip, stand the bike up vertically to allow the last of it to drain.

  4. 1999-2002 Suzuki SV650 Coolant Drain: passo 4, imagem 1 %32 1999-2002 Suzuki SV650 Coolant Drain: passo 4, imagem 2 %32 1999-2002 Suzuki SV650 Coolant Drain: passo 4, imagem 3 %32
    • Put the coolant drain plug back in its hole and turn it clockwise with a socket wrench or box end wrench until it is snug.

    • Do not over-tighten the drain plug or you risk stripping the threads. Suzuki rates the drain plug torque at 9.5 lb-ft (13 N-m).

    • Place the radiator cap back over the filler hole and turn it clockwise until is snug.

    • Placing the radiator cap back on the radiator will prevent debris from entering the radiator while working on the bike.

Conclusão

To reassemble your device, follow these instructions in reverse order.

Phillip Takahashi

Membro desde: 08/22/11

86.704 Reputação

Autoria de 87 guias

0 comentários

Adicione um comentário

Exibir estatísticas:

Últimas 24 horas: 0

Últimos 7 dias: 0

Últimos 30 dias: 0

Duração total: 302