Ir para o conteúdo principal

1997 Toyota Camry Stop and Tail Light Bulbs Replacement

O que você precisa

  1. 1997 Toyota Camry Stop and Tail Light Bulbs Replacement, Stop and Tail Light Bulbs: passo 1, imagem 1 %32 1997 Toyota Camry Stop and Tail Light Bulbs Replacement, Stop and Tail Light Bulbs: passo 1, imagem 2 %32 1997 Toyota Camry Stop and Tail Light Bulbs Replacement, Stop and Tail Light Bulbs: passo 1, imagem 3 %32
    • Open the trunk.

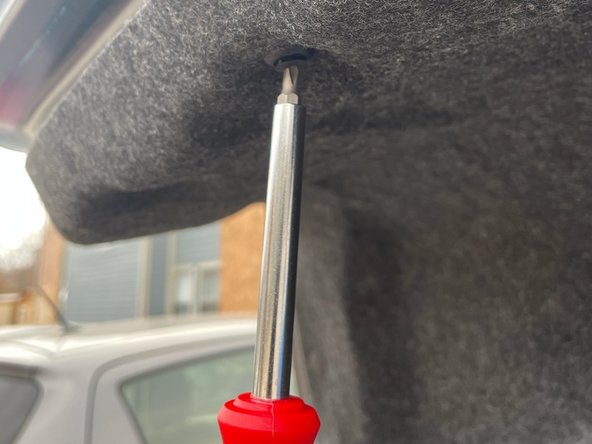
    • Loosen three 15 mm screws using a Phillips #1 screwdriver.

    • Pull the cover clips at the base to remove.

    • Potential for device damage: Do not pull the cover clips prior to unscrewing as the cover clips can break.

    • Remove the cover by folding the cover backwards to expose the bulb assembly.

  2. 1997 Toyota Camry Stop and Tail Light Bulbs Replacement: passo 2, imagem 1 %32 1997 Toyota Camry Stop and Tail Light Bulbs Replacement: passo 2, imagem 2 %32
    • Grab the inner light bulb assembly using your thumb and forefinger.

    • Rotate the bulb assembly a quarter turn counterclockwise.

    • Pull it straight outwards until the bulb is displayed.

  3. 1997 Toyota Camry Stop and Tail Light Bulbs Replacement: passo 3, imagem 1 %32
    • While holding the assembly, grab the base of the light bulb with your thumb and forefinger.

    • Pull the bulb away from the assembly until it detaches. Discard the old bulb.

  4. 1997 Toyota Camry Stop and Tail Light Bulbs Replacement: passo 4, imagem 1 %32
    • Grab the new inner tail light bulb 3157 and push it into the bulb assembly.

    • Insert the bulb assembly straight into the socket. Rotate it a quarter turn clockwise to secure it.

  5. 1997 Toyota Camry Stop and Tail Light Bulbs Replacement: passo 5, imagem 1 %32
    • Repeat this process with the outer light bulb assembly using bulb 904.

  6. 1997 Toyota Camry Stop and Tail Light Bulbs Replacement: passo 6, imagem 1 %32 1997 Toyota Camry Stop and Tail Light Bulbs Replacement: passo 6, imagem 2 %32
    • Unfold the cover and place it back over the bulb sockets. Push the three cover clips into their sockets .

    • Screw the three 15 mm screws in with Phillips #1 screwdriver to secure the cover.

Conclusão

Your stop and tail lights have been properly replaced and your replace bulb indicator should be off on your dashboard.

Ivan Navas

Membro desde: 02/24/21

138 Reputação

Autoria de 1 guia

0 comentários

Adicione um comentário

Exibir estatísticas:

Últimas 24 horas: 2

Últimos 7 dias: 17

Últimos 30 dias: 57

Duração total: 2,249