Introdução
The idler arm is an essential part of the steering and suspension system on a truck. If the idler arm is not functioning correctly, then it will eventually completely break and leave the truck unable to be steered. This guide will take you through how to replace a bad arm.
O que você precisa
-
-
First the truck should be prepared to be worked on.
-
Disconnect the negative battery terminal from the battery in order to be sure that no electrical current is running through the truck.
-
Set the parking break and put the truck in 1st gear.
-
Be sure to chock the wheels, so that it will not roll while you are underneath.
-
-
-
-
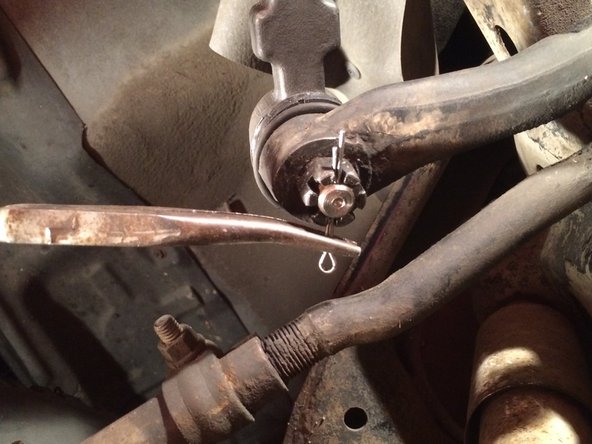
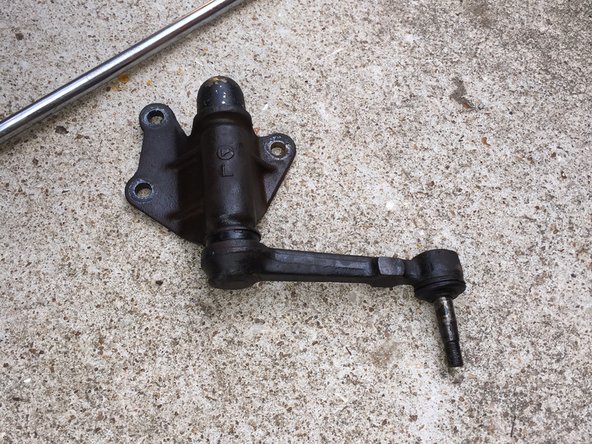
The first step is to remove the set nut holding the arm to the relay rod.
-
Begin with cleaning any oil and dirt from the set nut and then spray with the penetrating lubricant.
-
Once the spray has sat for 5 minutes, use needle nose pliers to straighten the cotter pin and pull it out.
-
Remove the set nut using a 19 mm socket.
-
-
-
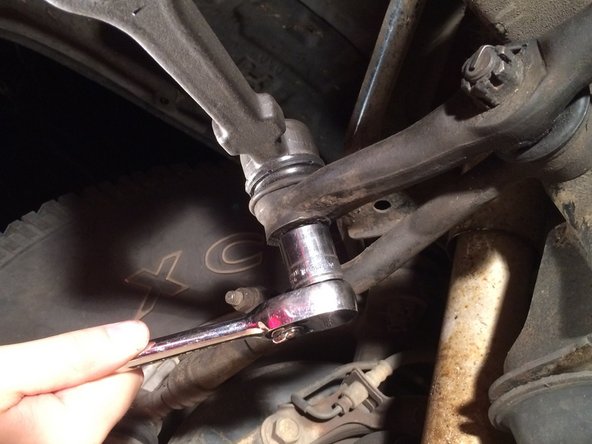
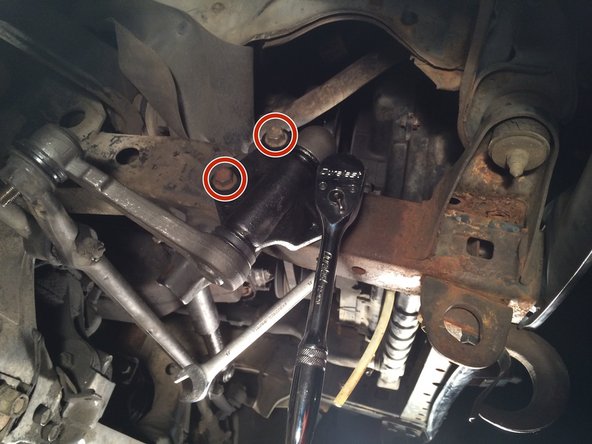
Now that the relay rods are disconnected, the arm can be unbolted from the frame.
-
Spray both the bolts and the nuts with the penetrating lubricant.
-
On the bolt head use the breaker bar and 17 mm socket; put the 17 mm box wrench on the nut on the back side of the arm.
-
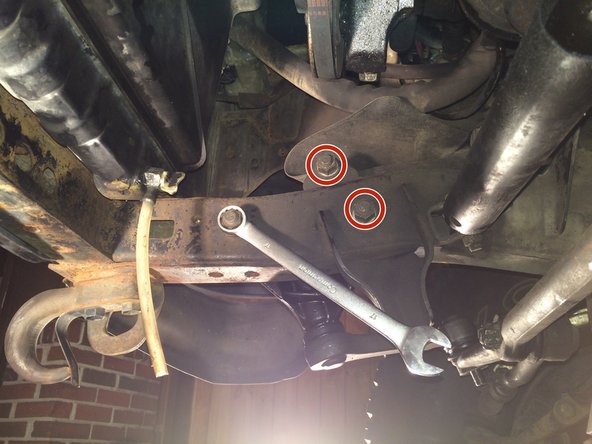
The wrench will get stuck on the frame and the breaker bar can then be used to break the rust off the bolt holding it onto the frame.
-
Once the bolt is loose a socket wrench can replace the breaker bar to make the job easier.
-
The (2) 4 1/4" bolts go on either side of the arm. The (1) 3 1/2" bolt goes at the top.
-


To reassemble your device, follow these instructions in reverse order.
To reassemble your device, follow these instructions in reverse order.
Cancelar: não concluí este guia.
2 outras pessoas executaram este guia.
Equipe

University of Memphis, Team 1-1, Kim Fall 2015 Membro de University of Memphis, Team 1-1, Kim Fall 2015
UM-KIM-F15S1G1
Membros da 4
Autoria de 2 guias